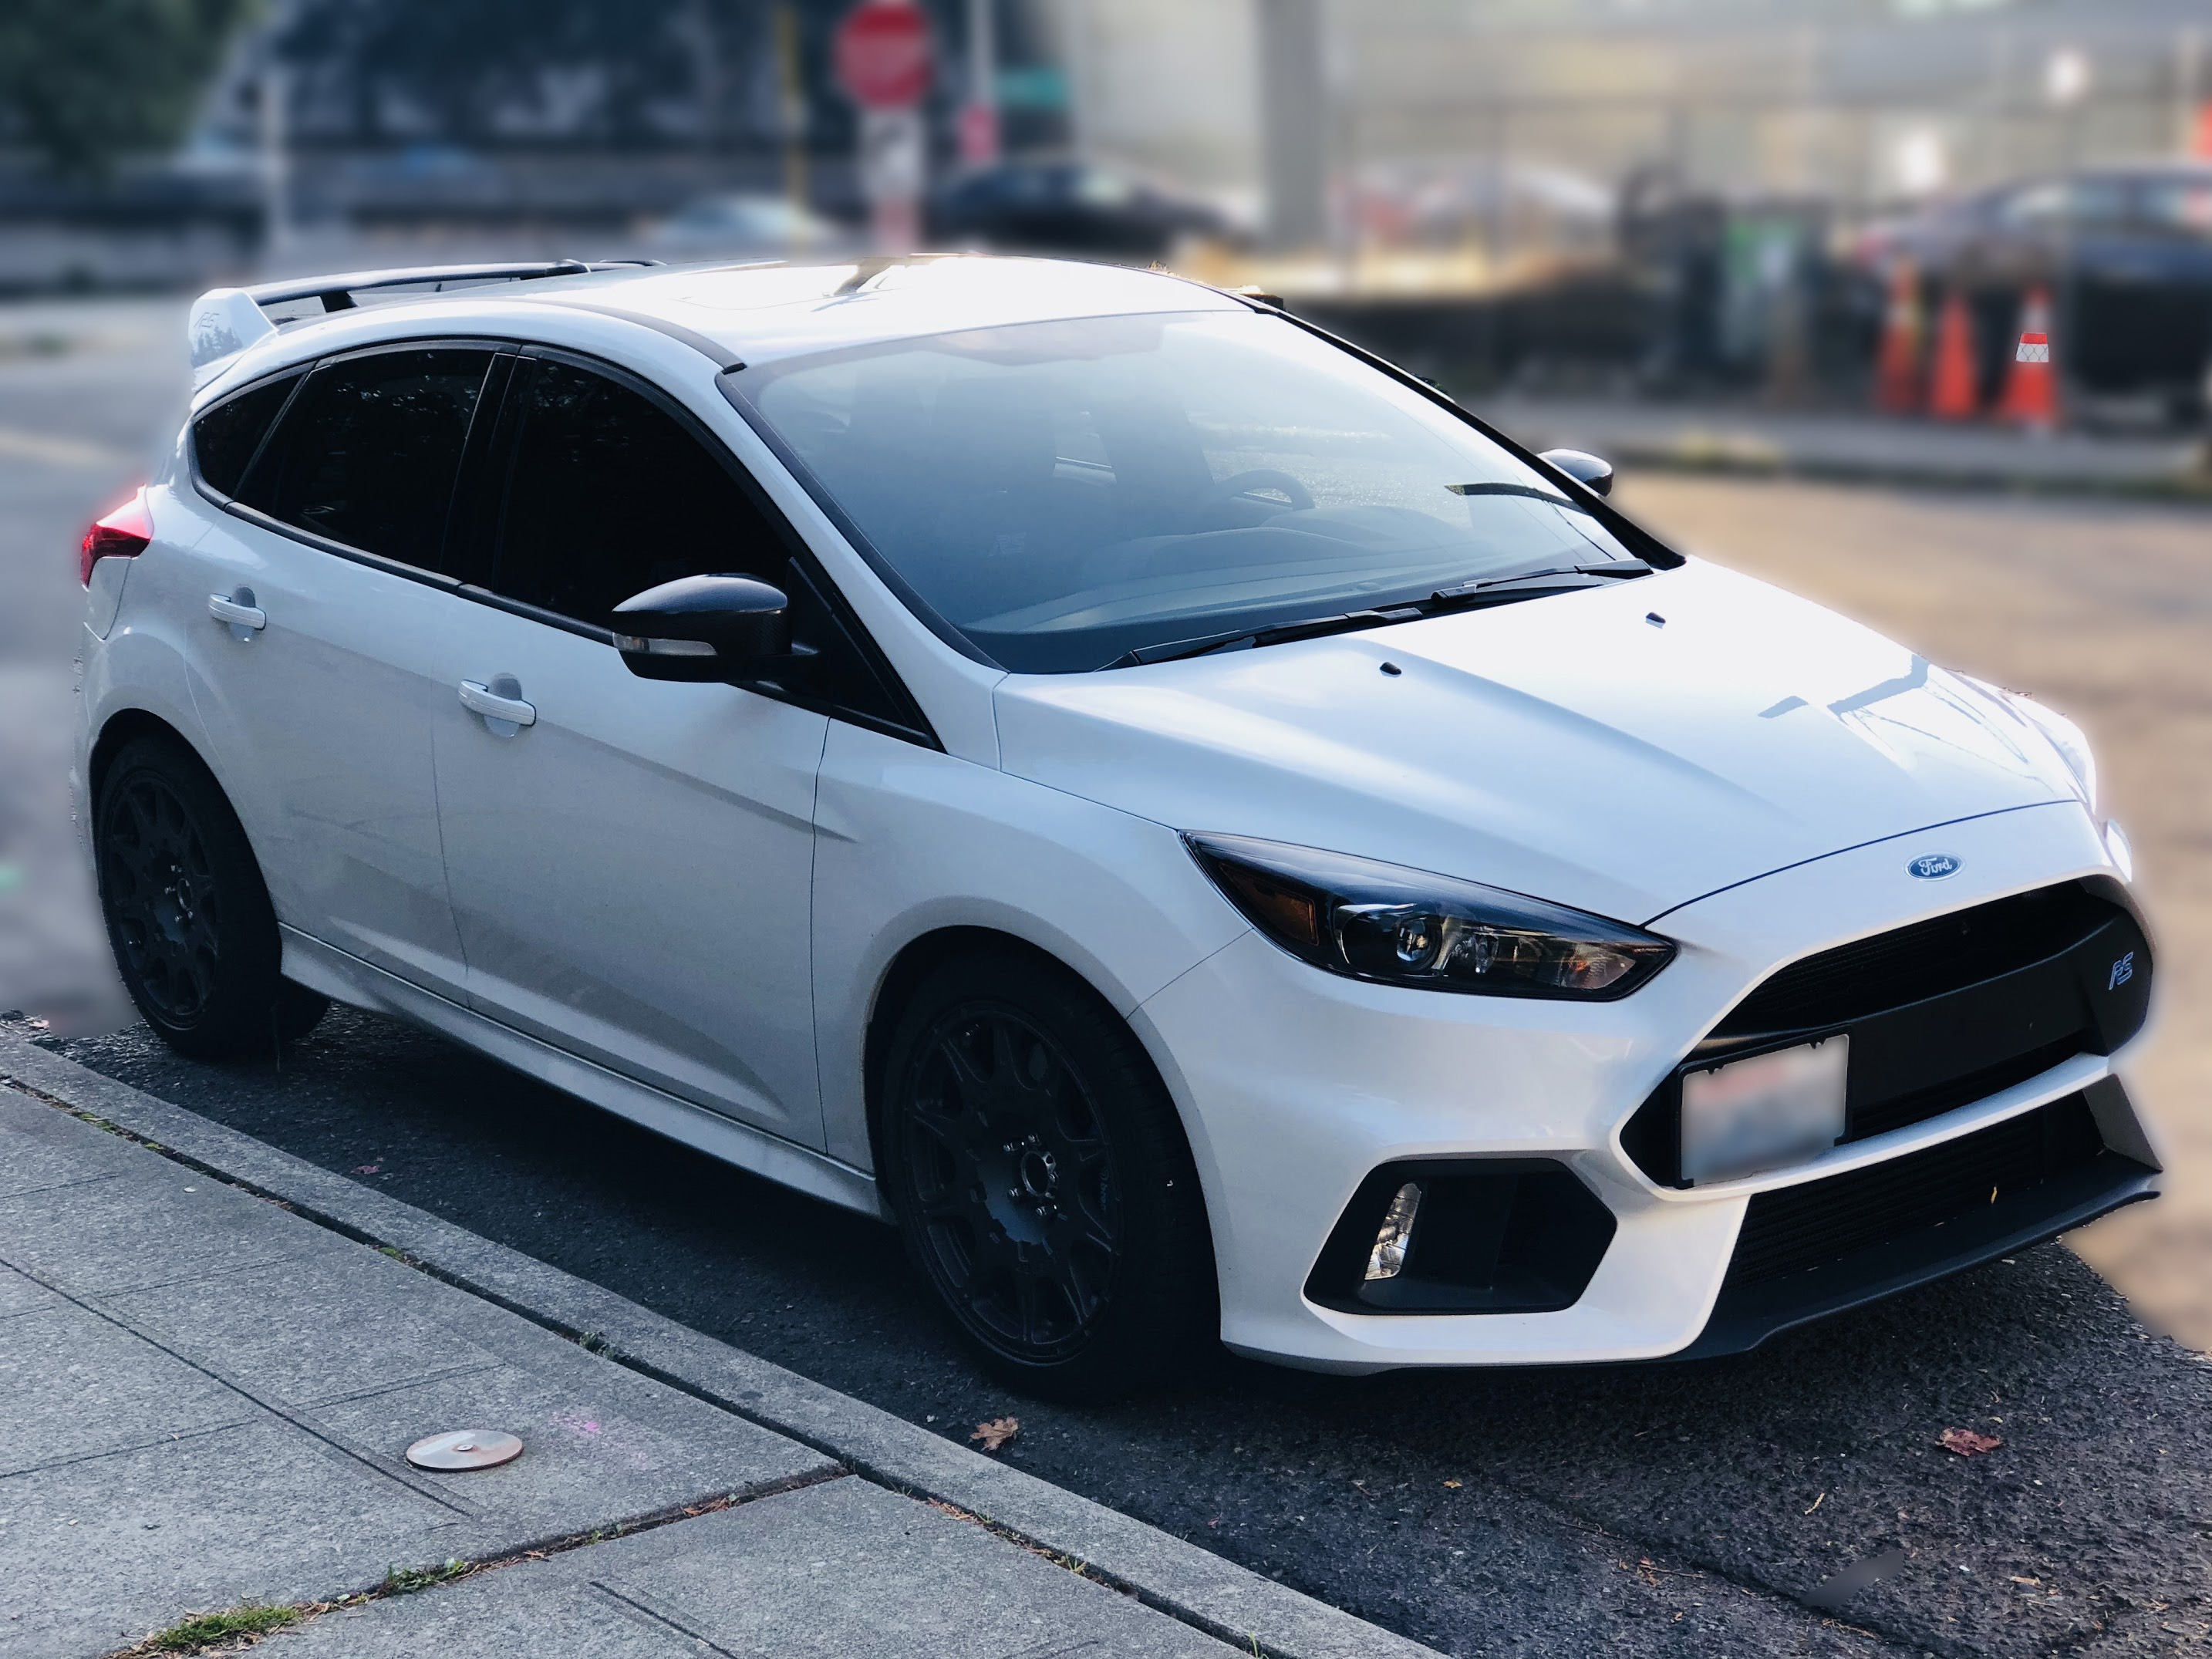
My 2017 Ford Focus RS (mk3) is a joy to drive and i like its styling. I’m a first time Ford owner, and got in on the “made in USA” car thing just in time for Ford to discontinue all future sales of car vehicles (except for Mustang) which might work out just fine for me, as I think of this project car as a long-term toy to use for track and occasional car outings. Now it will also be the last ford hot-hatch made for a long time?! Bonus.
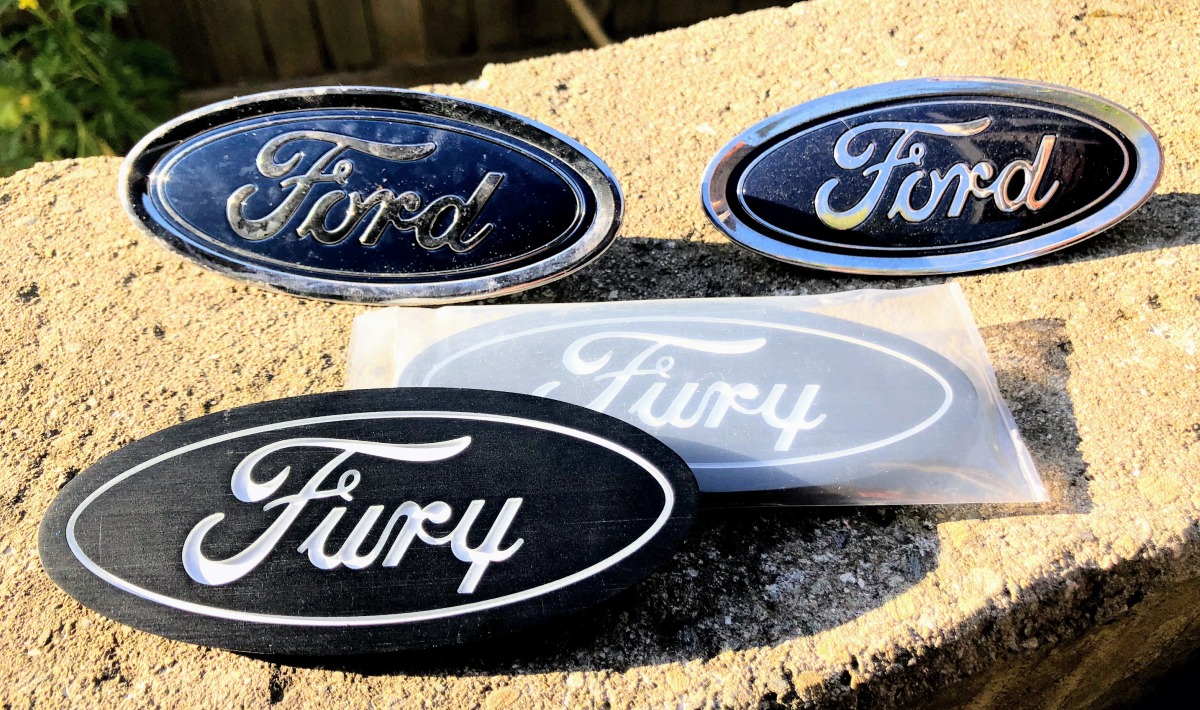
When i looked over the exterior stylings of the car one of the things that stood out for me as a eyesore is the blue on white stock “billet badges”, the thing on the hood and the trunk that say “Ford” in the classic font. I found a custom fabricator and design shop called Billet Badges that had awesome designs, and when i contacted them they assured me that as long as I was patient and gave them time (turned out to be about 4 months) to design and spec the new billets, they’d be happy to do a custom design. I went with “Fury” in the same Ford font, which feels playful and true to the original mark, but unique and a tribute to the awesome heroine Furiosa from the last Mad Max Fury Road film.
The badges came a few weeks ago and I got started on install over the last day and wanted to post my findings/process for others thinking of this kind of mod.

Here’s the first headline: Be warned, the Ford Focus RS mk3 (2016-2018) front billet badge (“ford emblem” on hood) does indeed have screws that need to be removed from inside the engine bay. Floss and a heat gun alone will get you nowhere! I was unable to find any videos or posts that correctly showed this install challenge. Floss alone will rip and hurt your hands–this job requires unfastening two screw bolts from under the front bumber/face of the hood.
Let’s jump right to the problem piece. Using a heat gun (to warm up the pieces and make the glue that binds them to the surface a little looser/easier to manipulate) is a great first step and I’ve used to remove several outer badges on this and other cars. Then, using tooth-floss, you can shimmy the floss between the surface and the badge, with a back-and-forth motion gently bitting into the adhesive and releasing the bond, eventually leading to the piece/badge popping right off.
But not with the front badge, which looks like this:
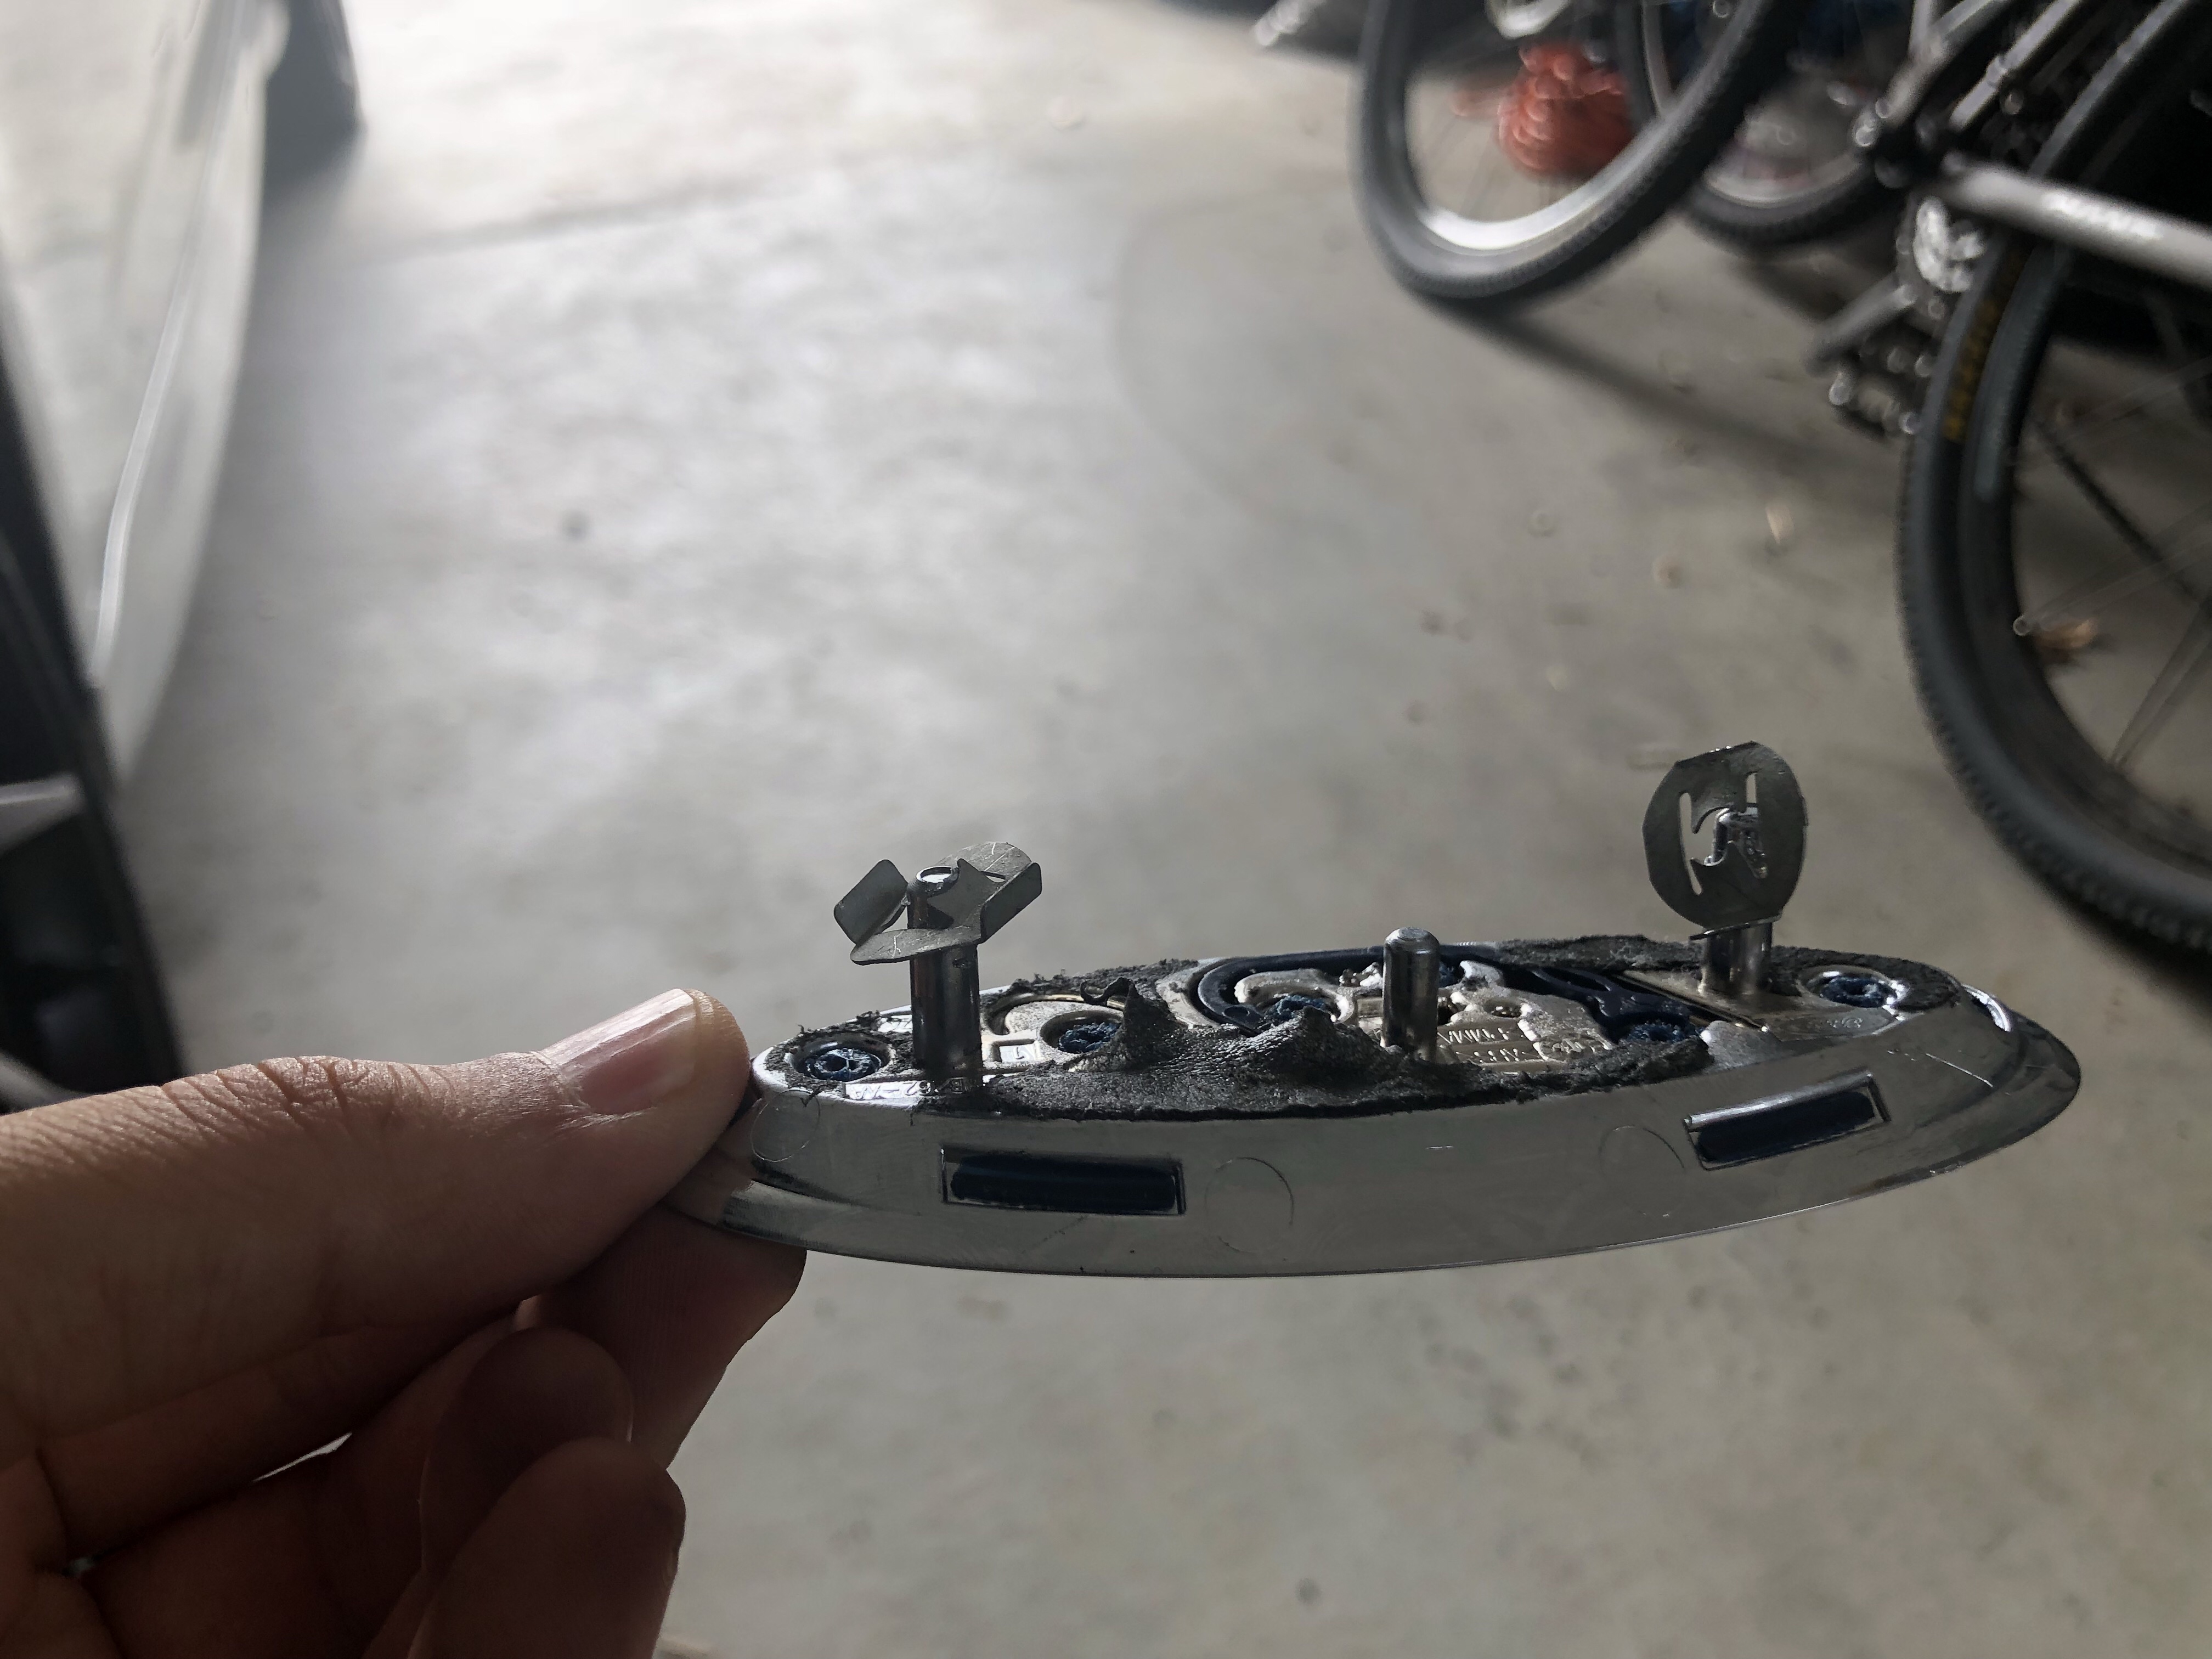
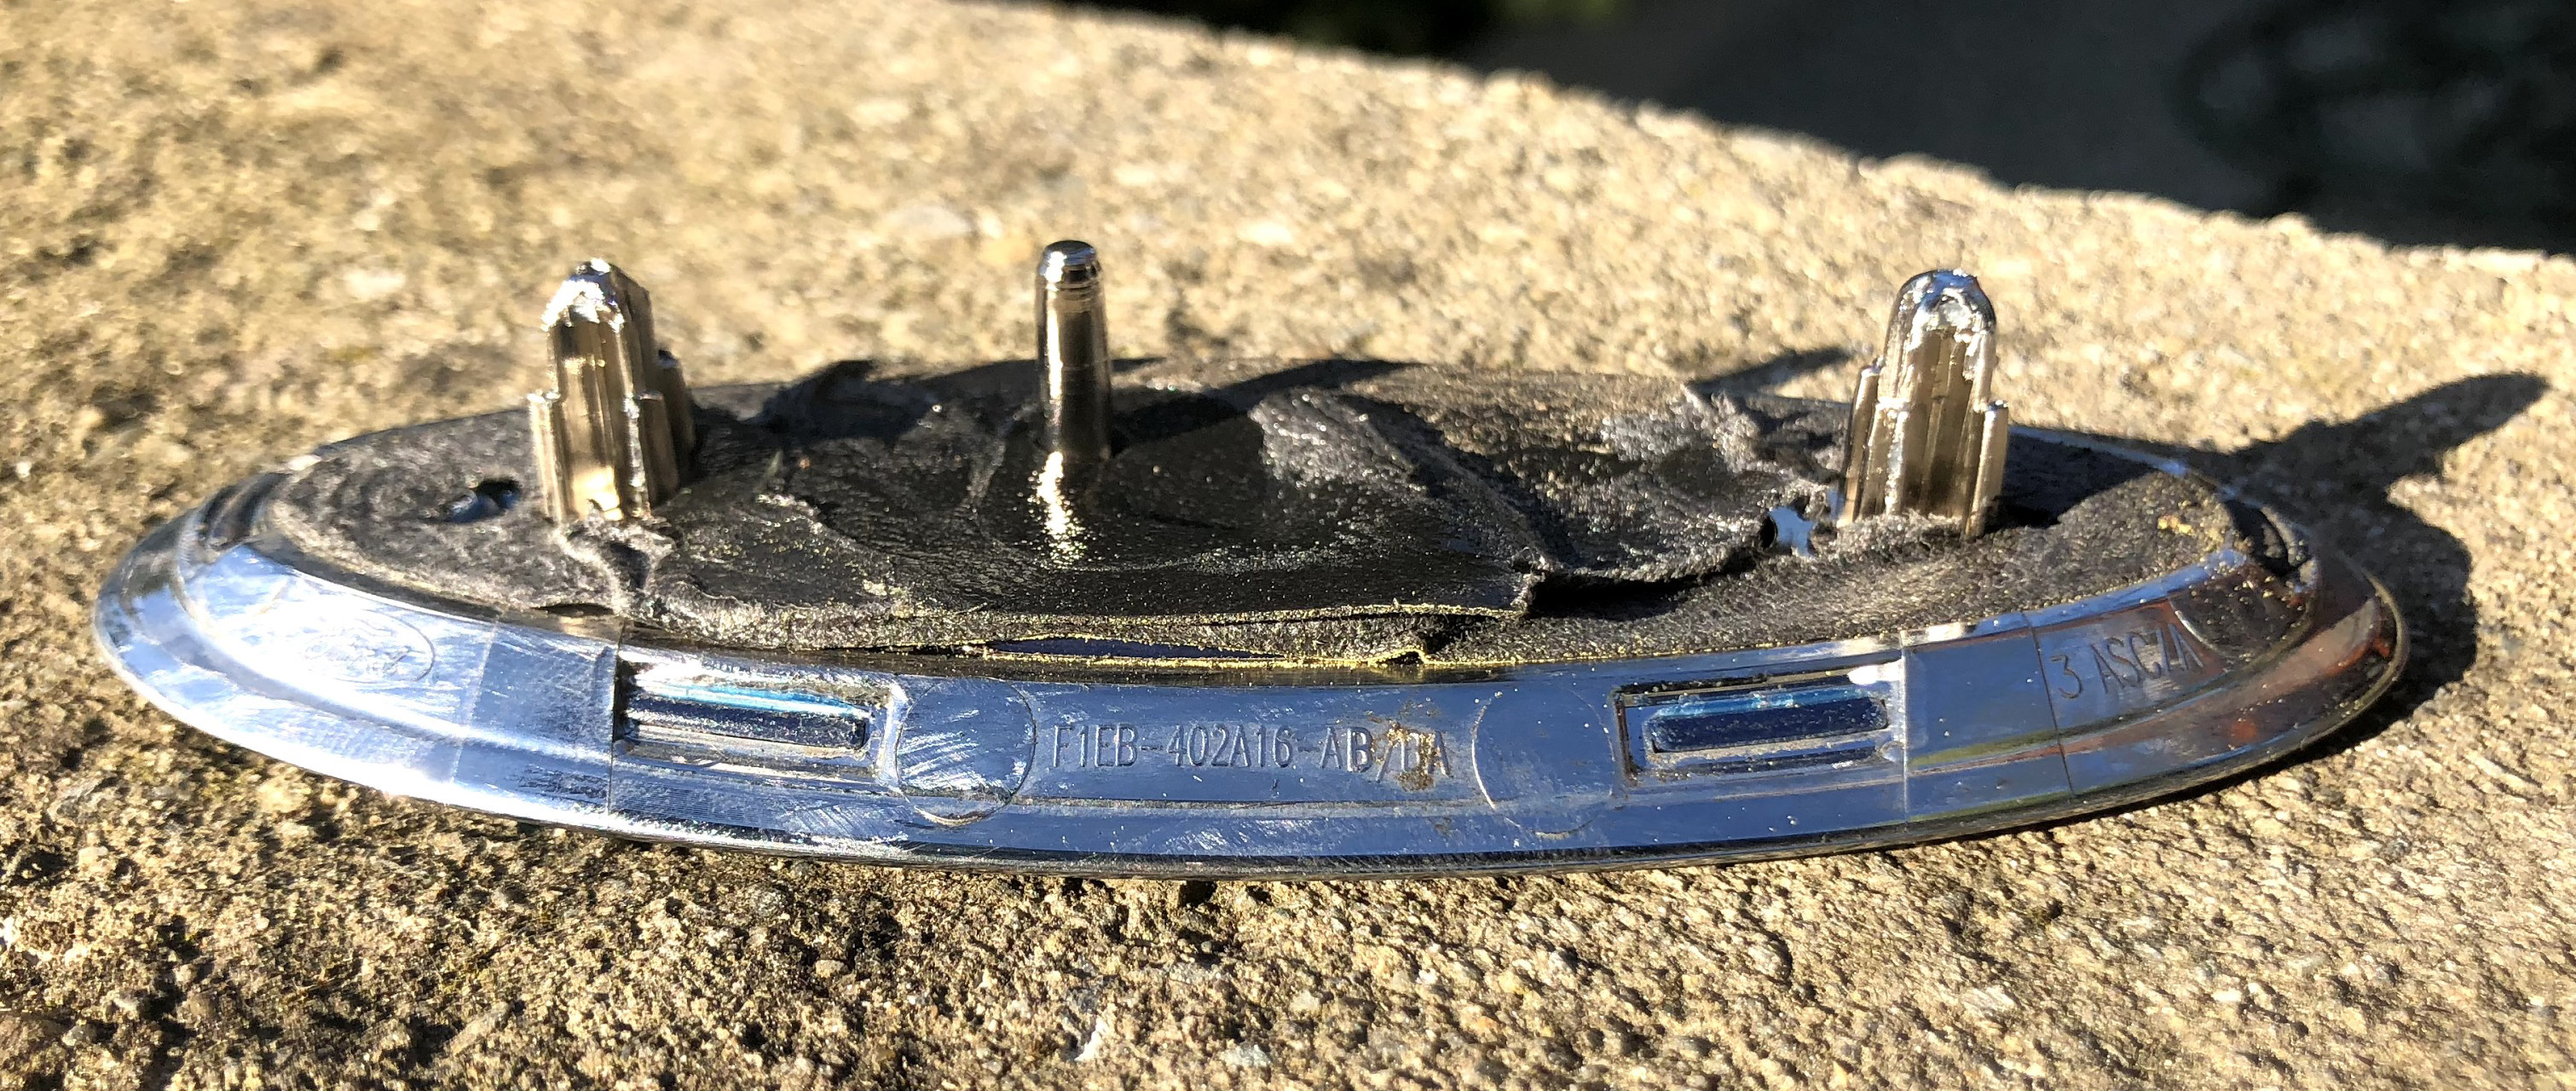
You can see the removed emblem and the fasteners. Note the thick plastic screws that are fused to the emblem and are threaded. Those little fasteners are threaded onto the end of the two outer plastic aligners. DO NOT try to rip/pull this off, you’ll damage the body fender/bumper. Instead, go in through the engine compartment, get behind the badge, and use some pliers to twist/turn the fasteners off. Then the piece will come off with some gentle tugging and the floss/cutting of the glue-binding. When off, you’ll see this:
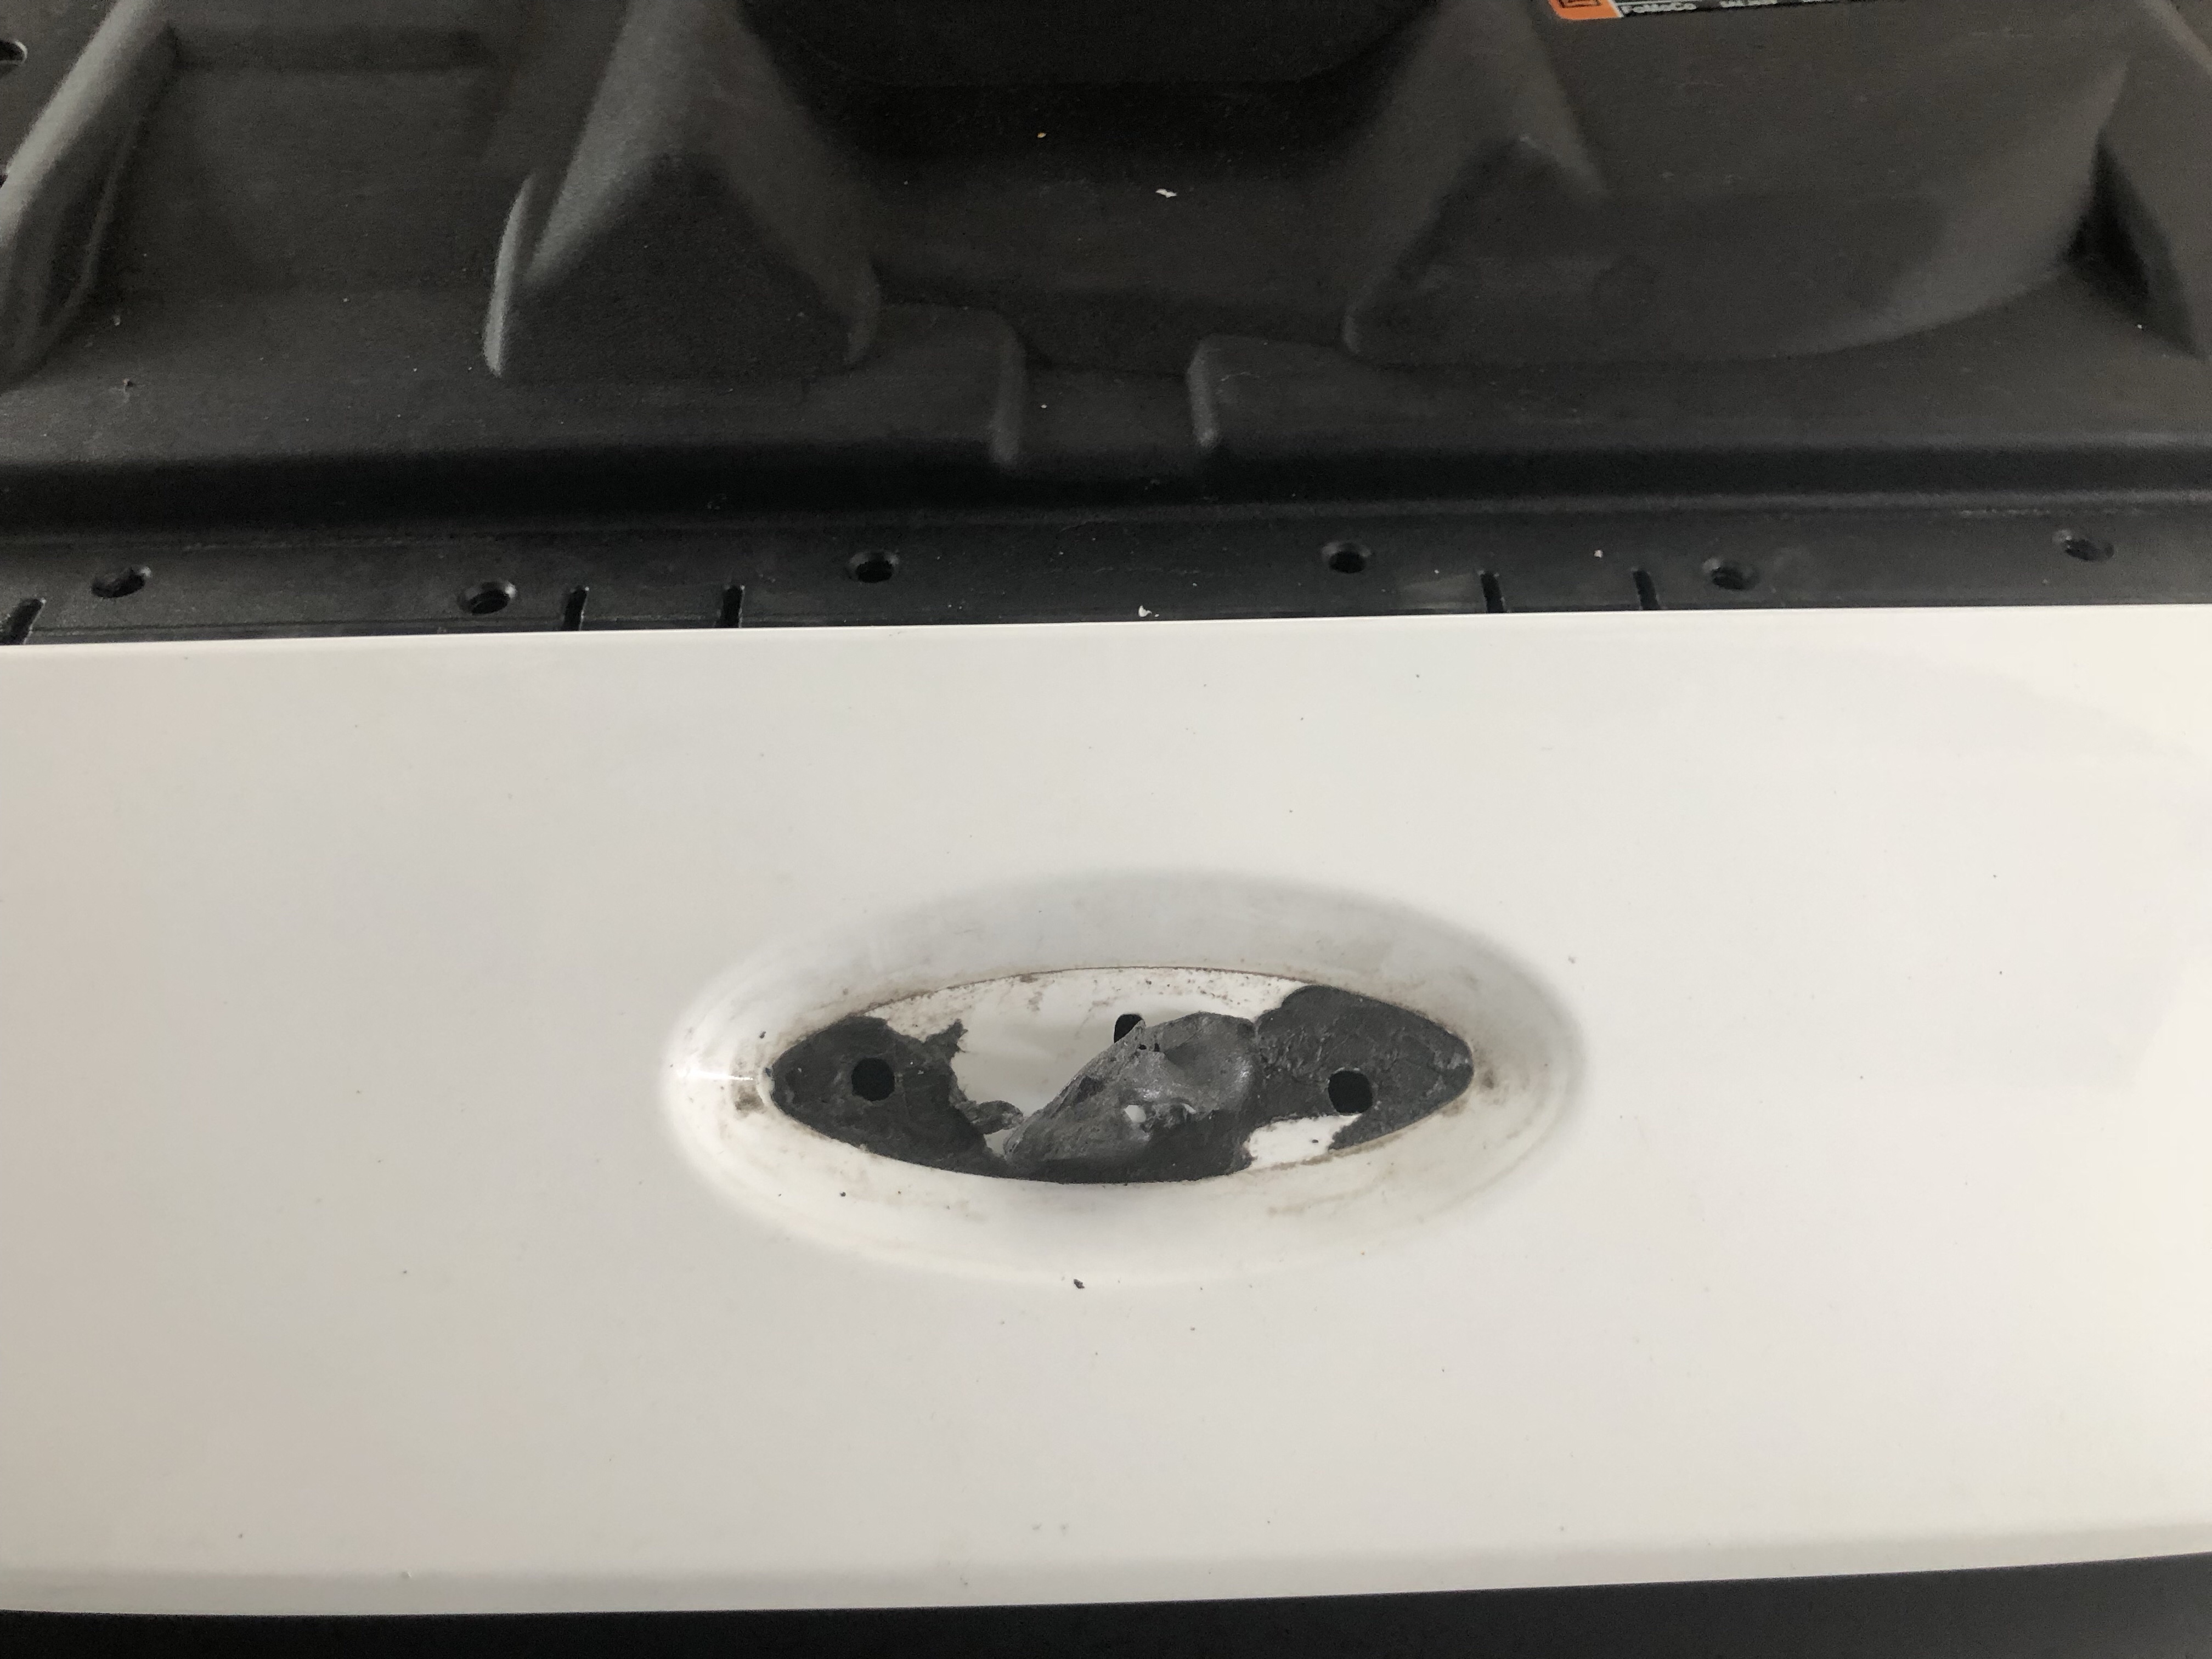
There is lots of adhesive to break down. A little elbow grease, some Goo Remover fluid, and some gentle scrubbing and fingernail work, and voila:
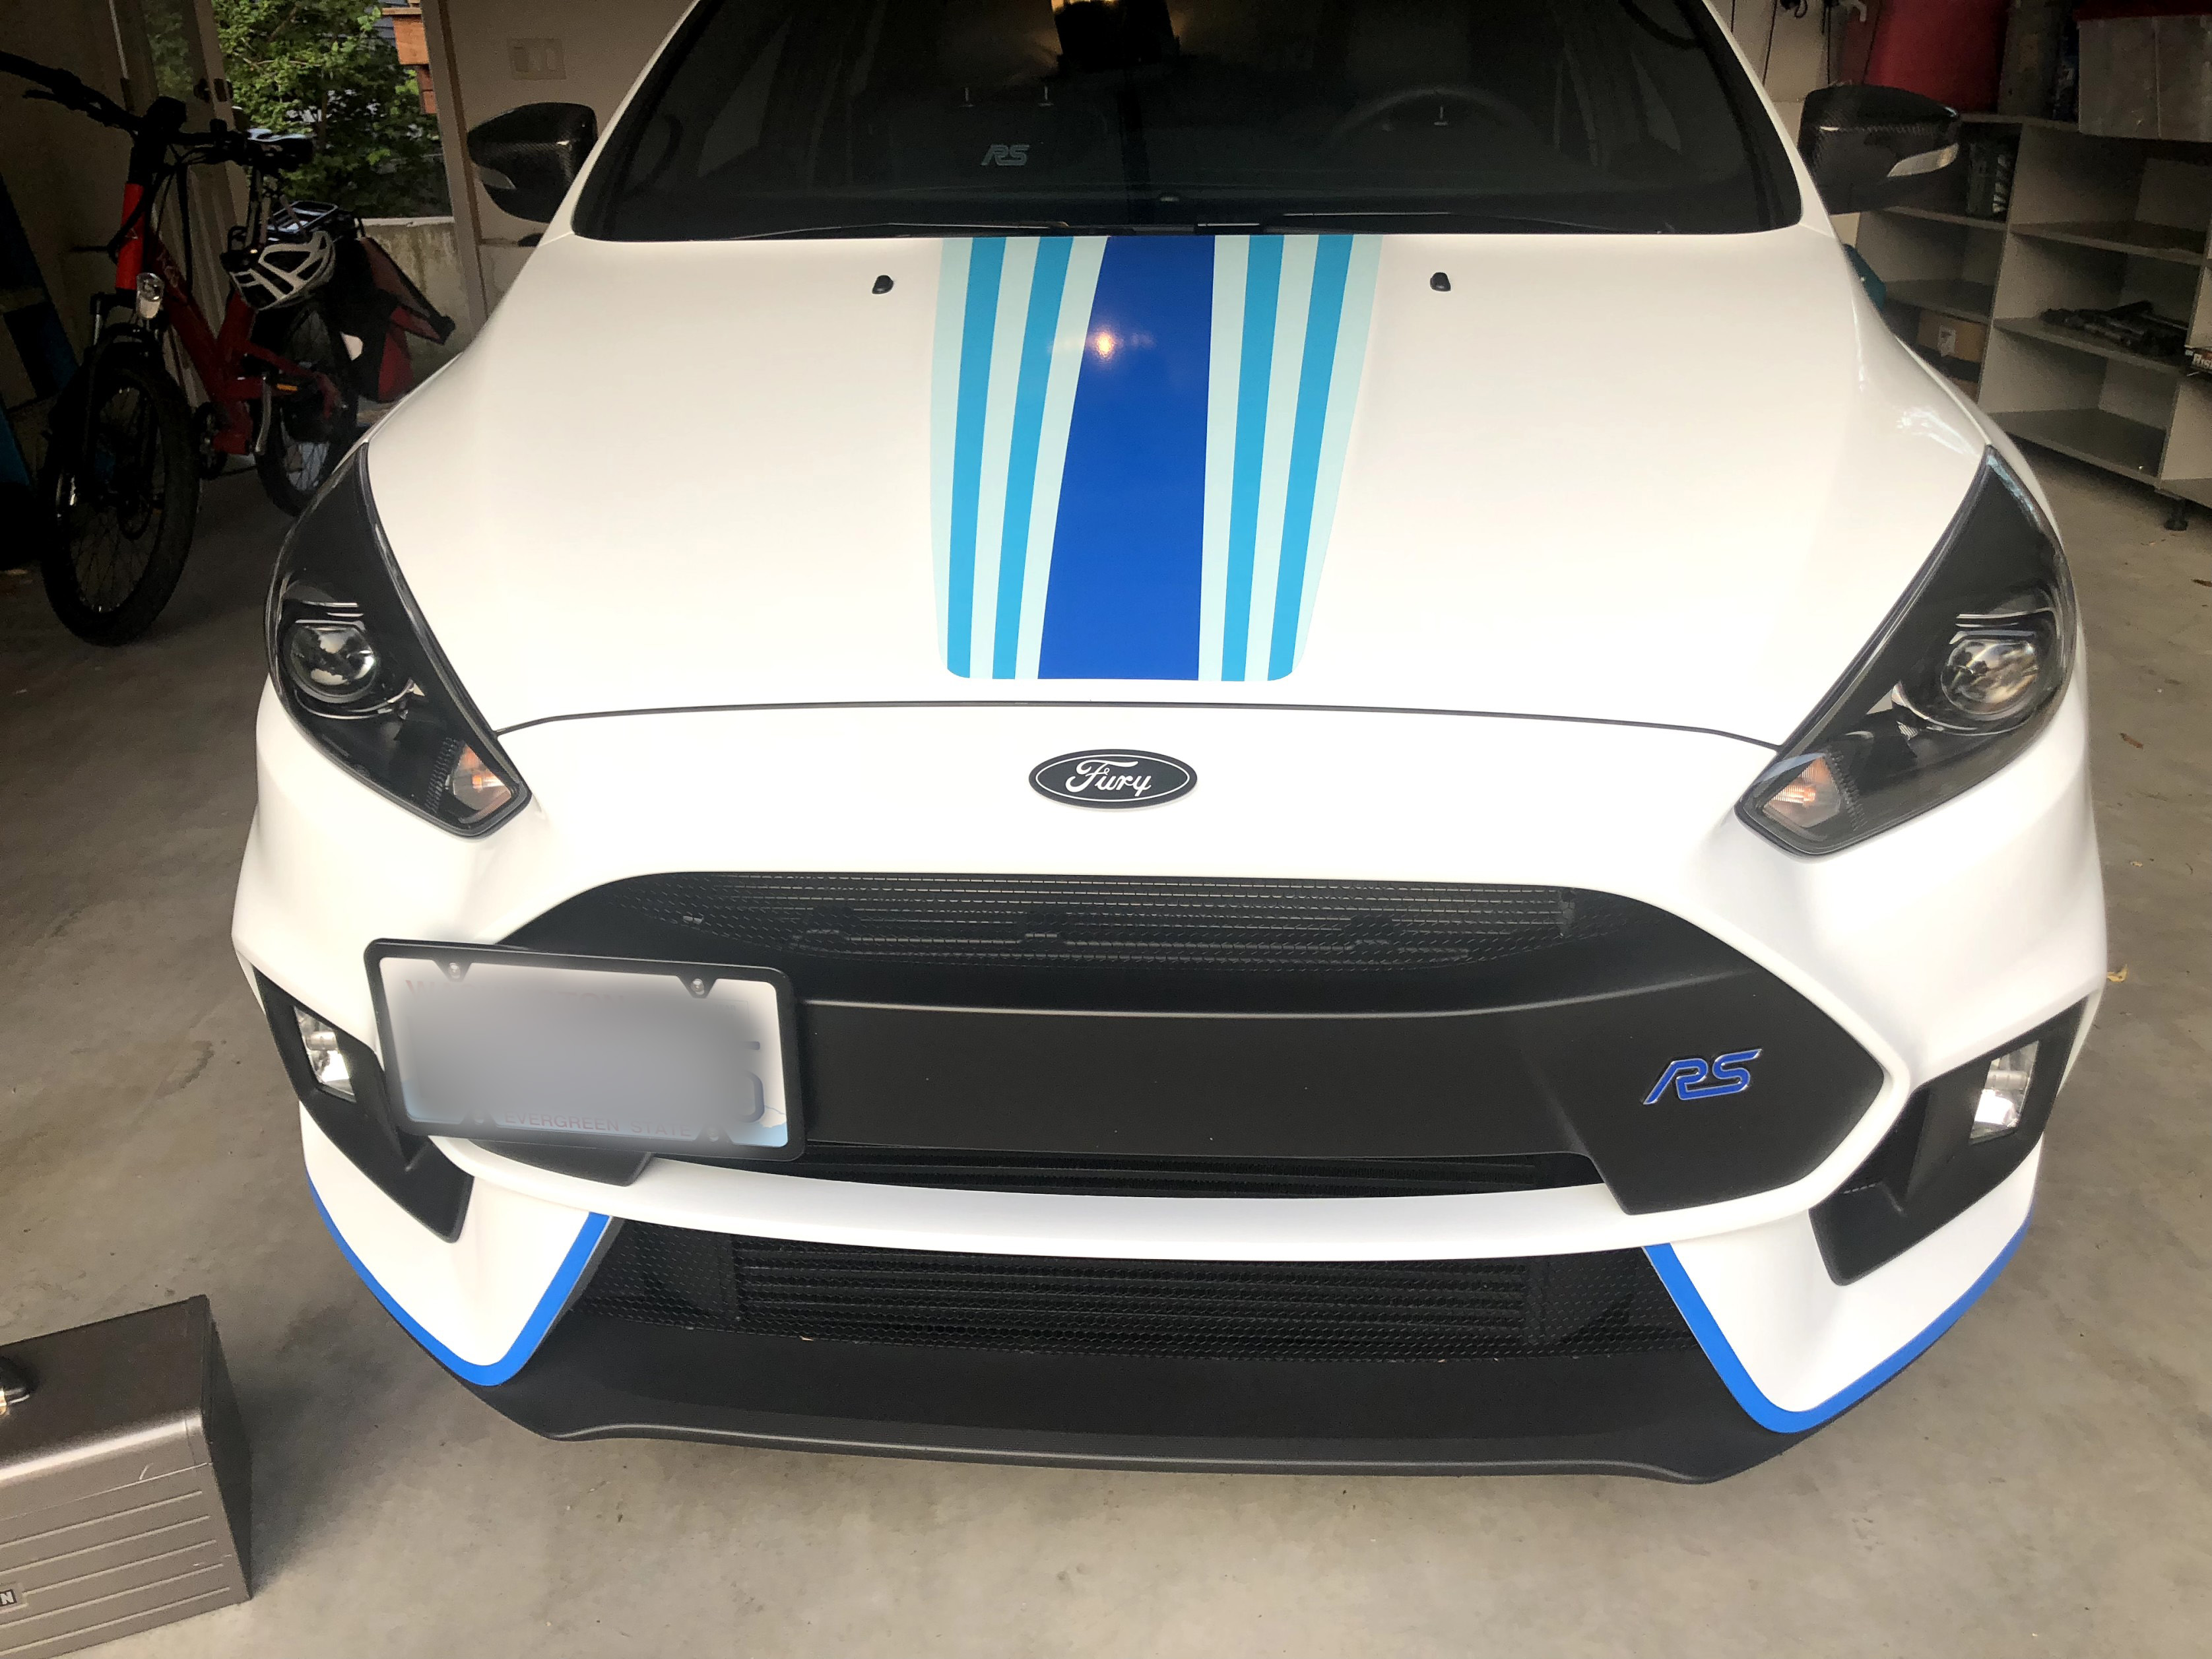
I then placed the new billet badge in the slot to see if the fit was right, and was amazed at *perfect* fit. Flush to the hood, perfect depth, oval size, etc.
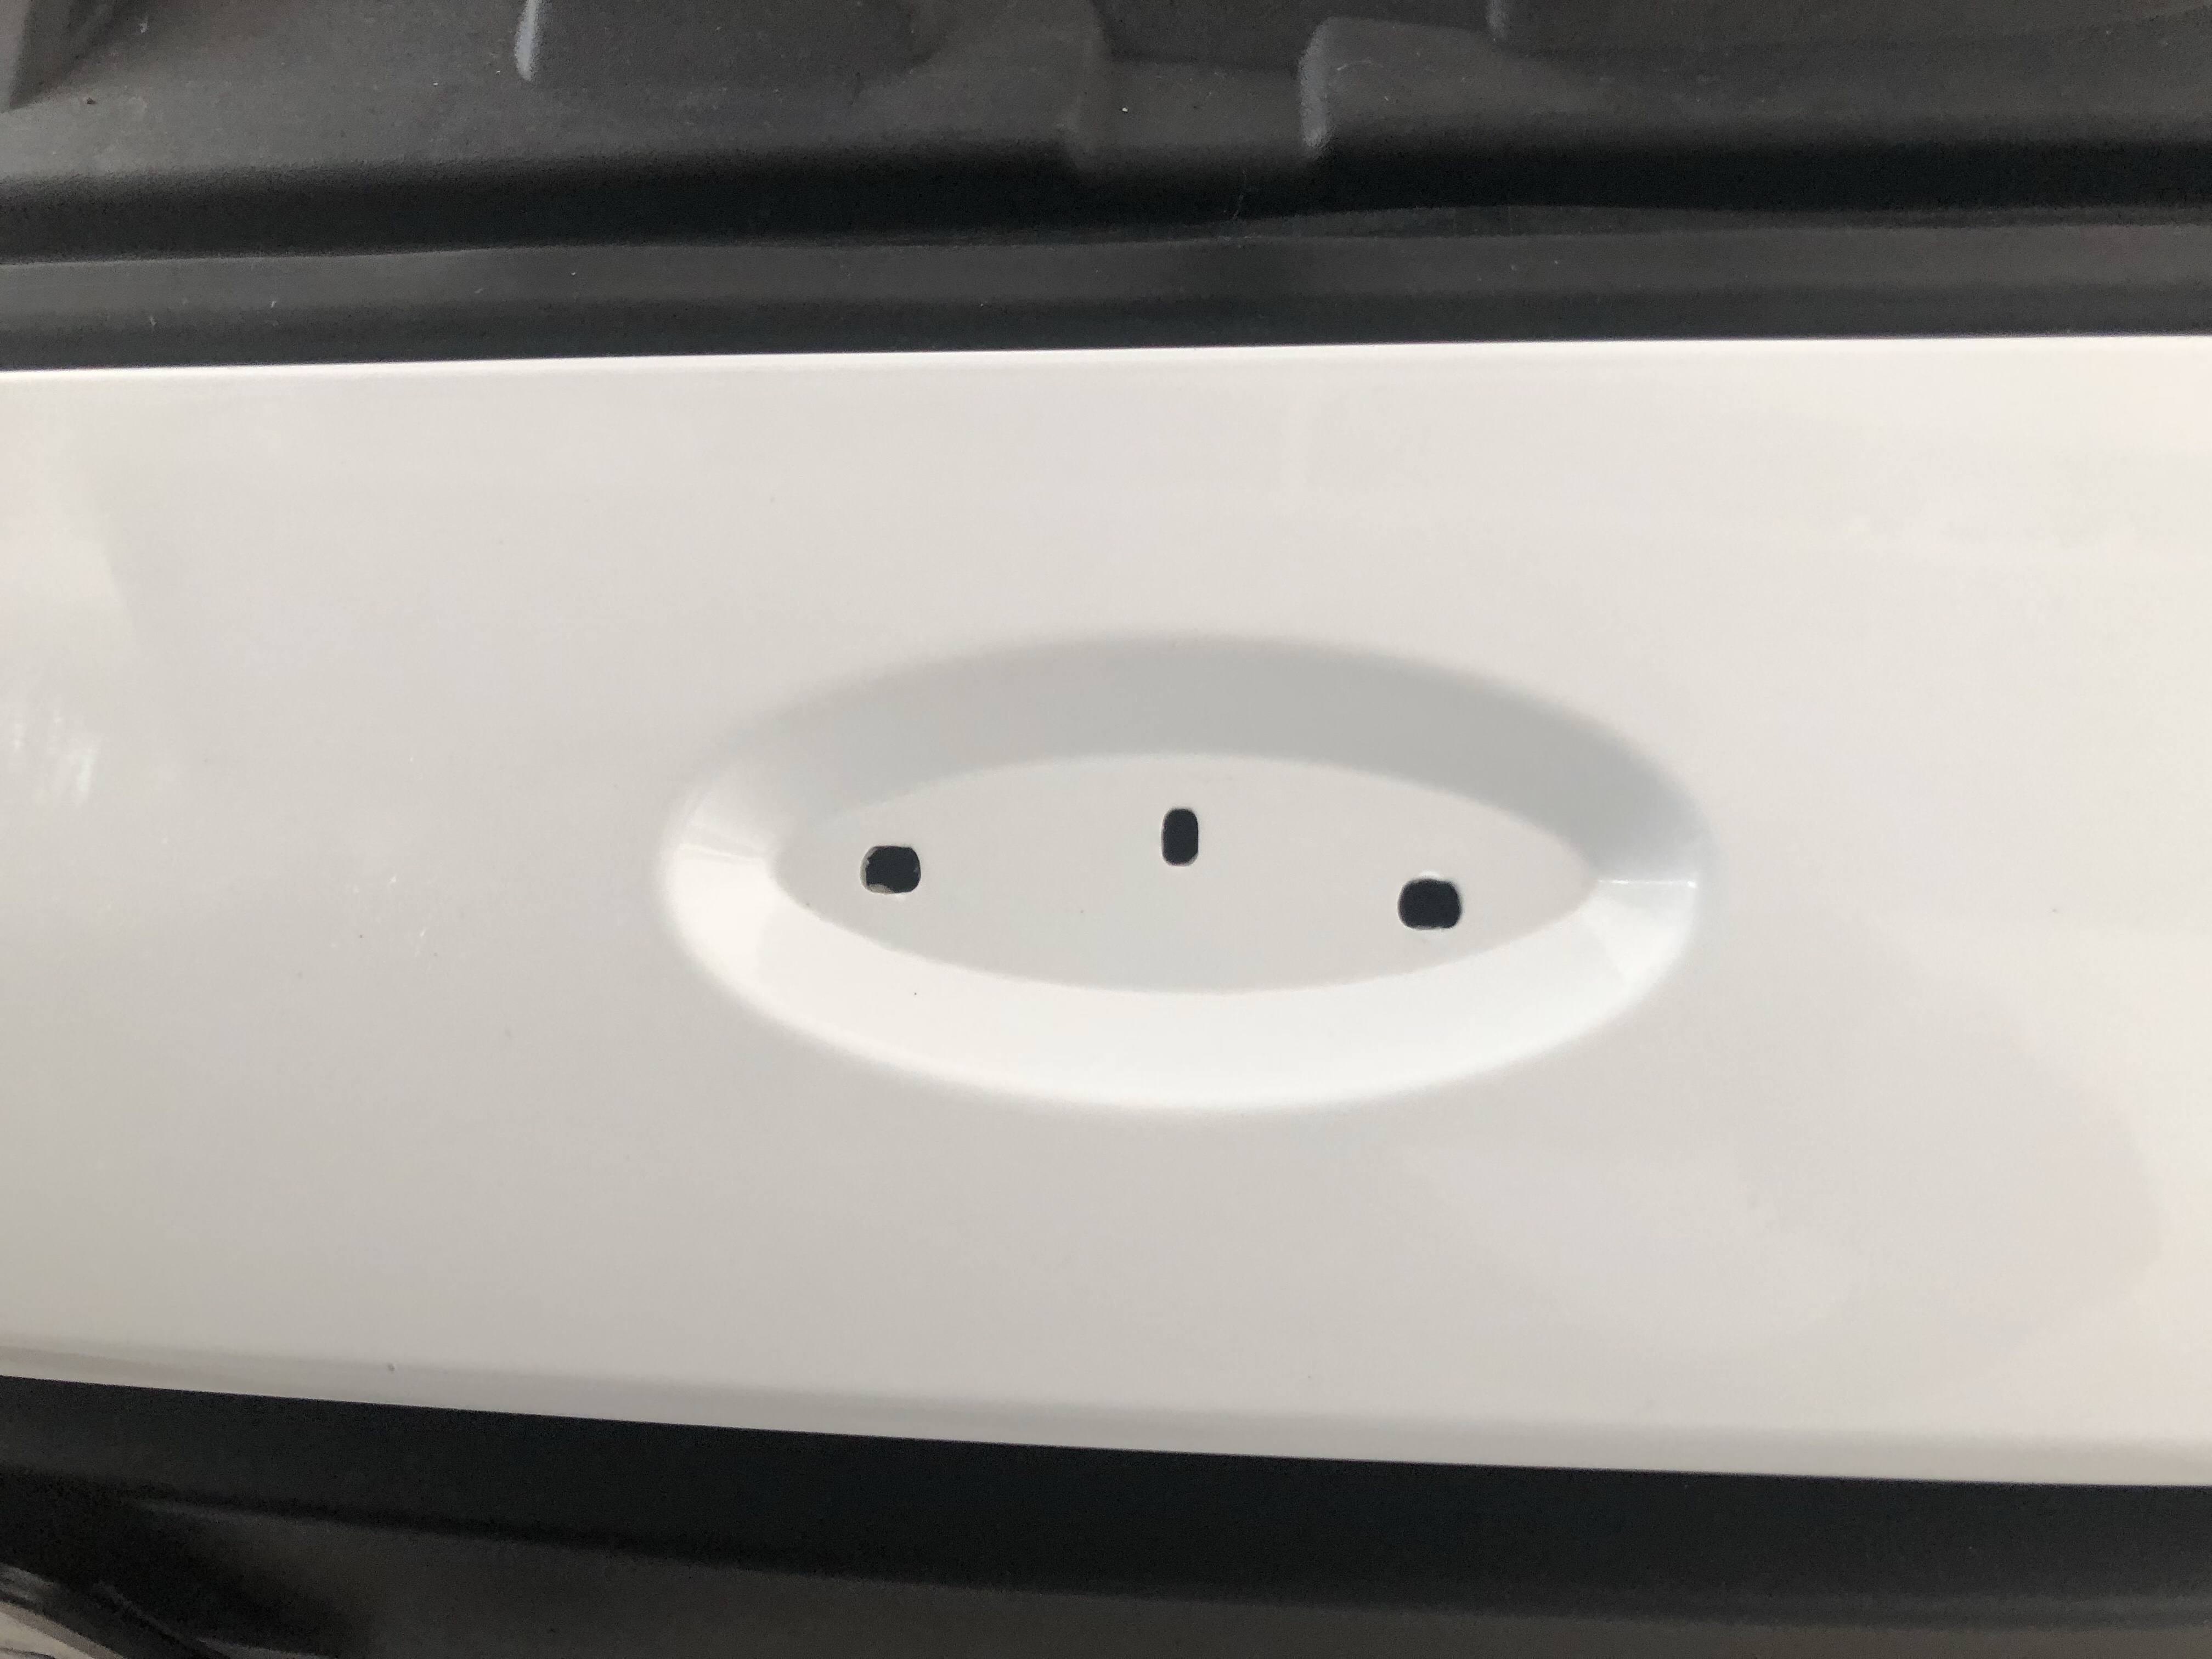
Now onto the back tailgate. Turns out the badge in the back is NOT fastened, rather, is simply pushed in through some alignment holes. here’s what the piece looks like removed, with some floss to loosen the grip, and some gentle tugging.
And the tailgate hole after some cleanup:
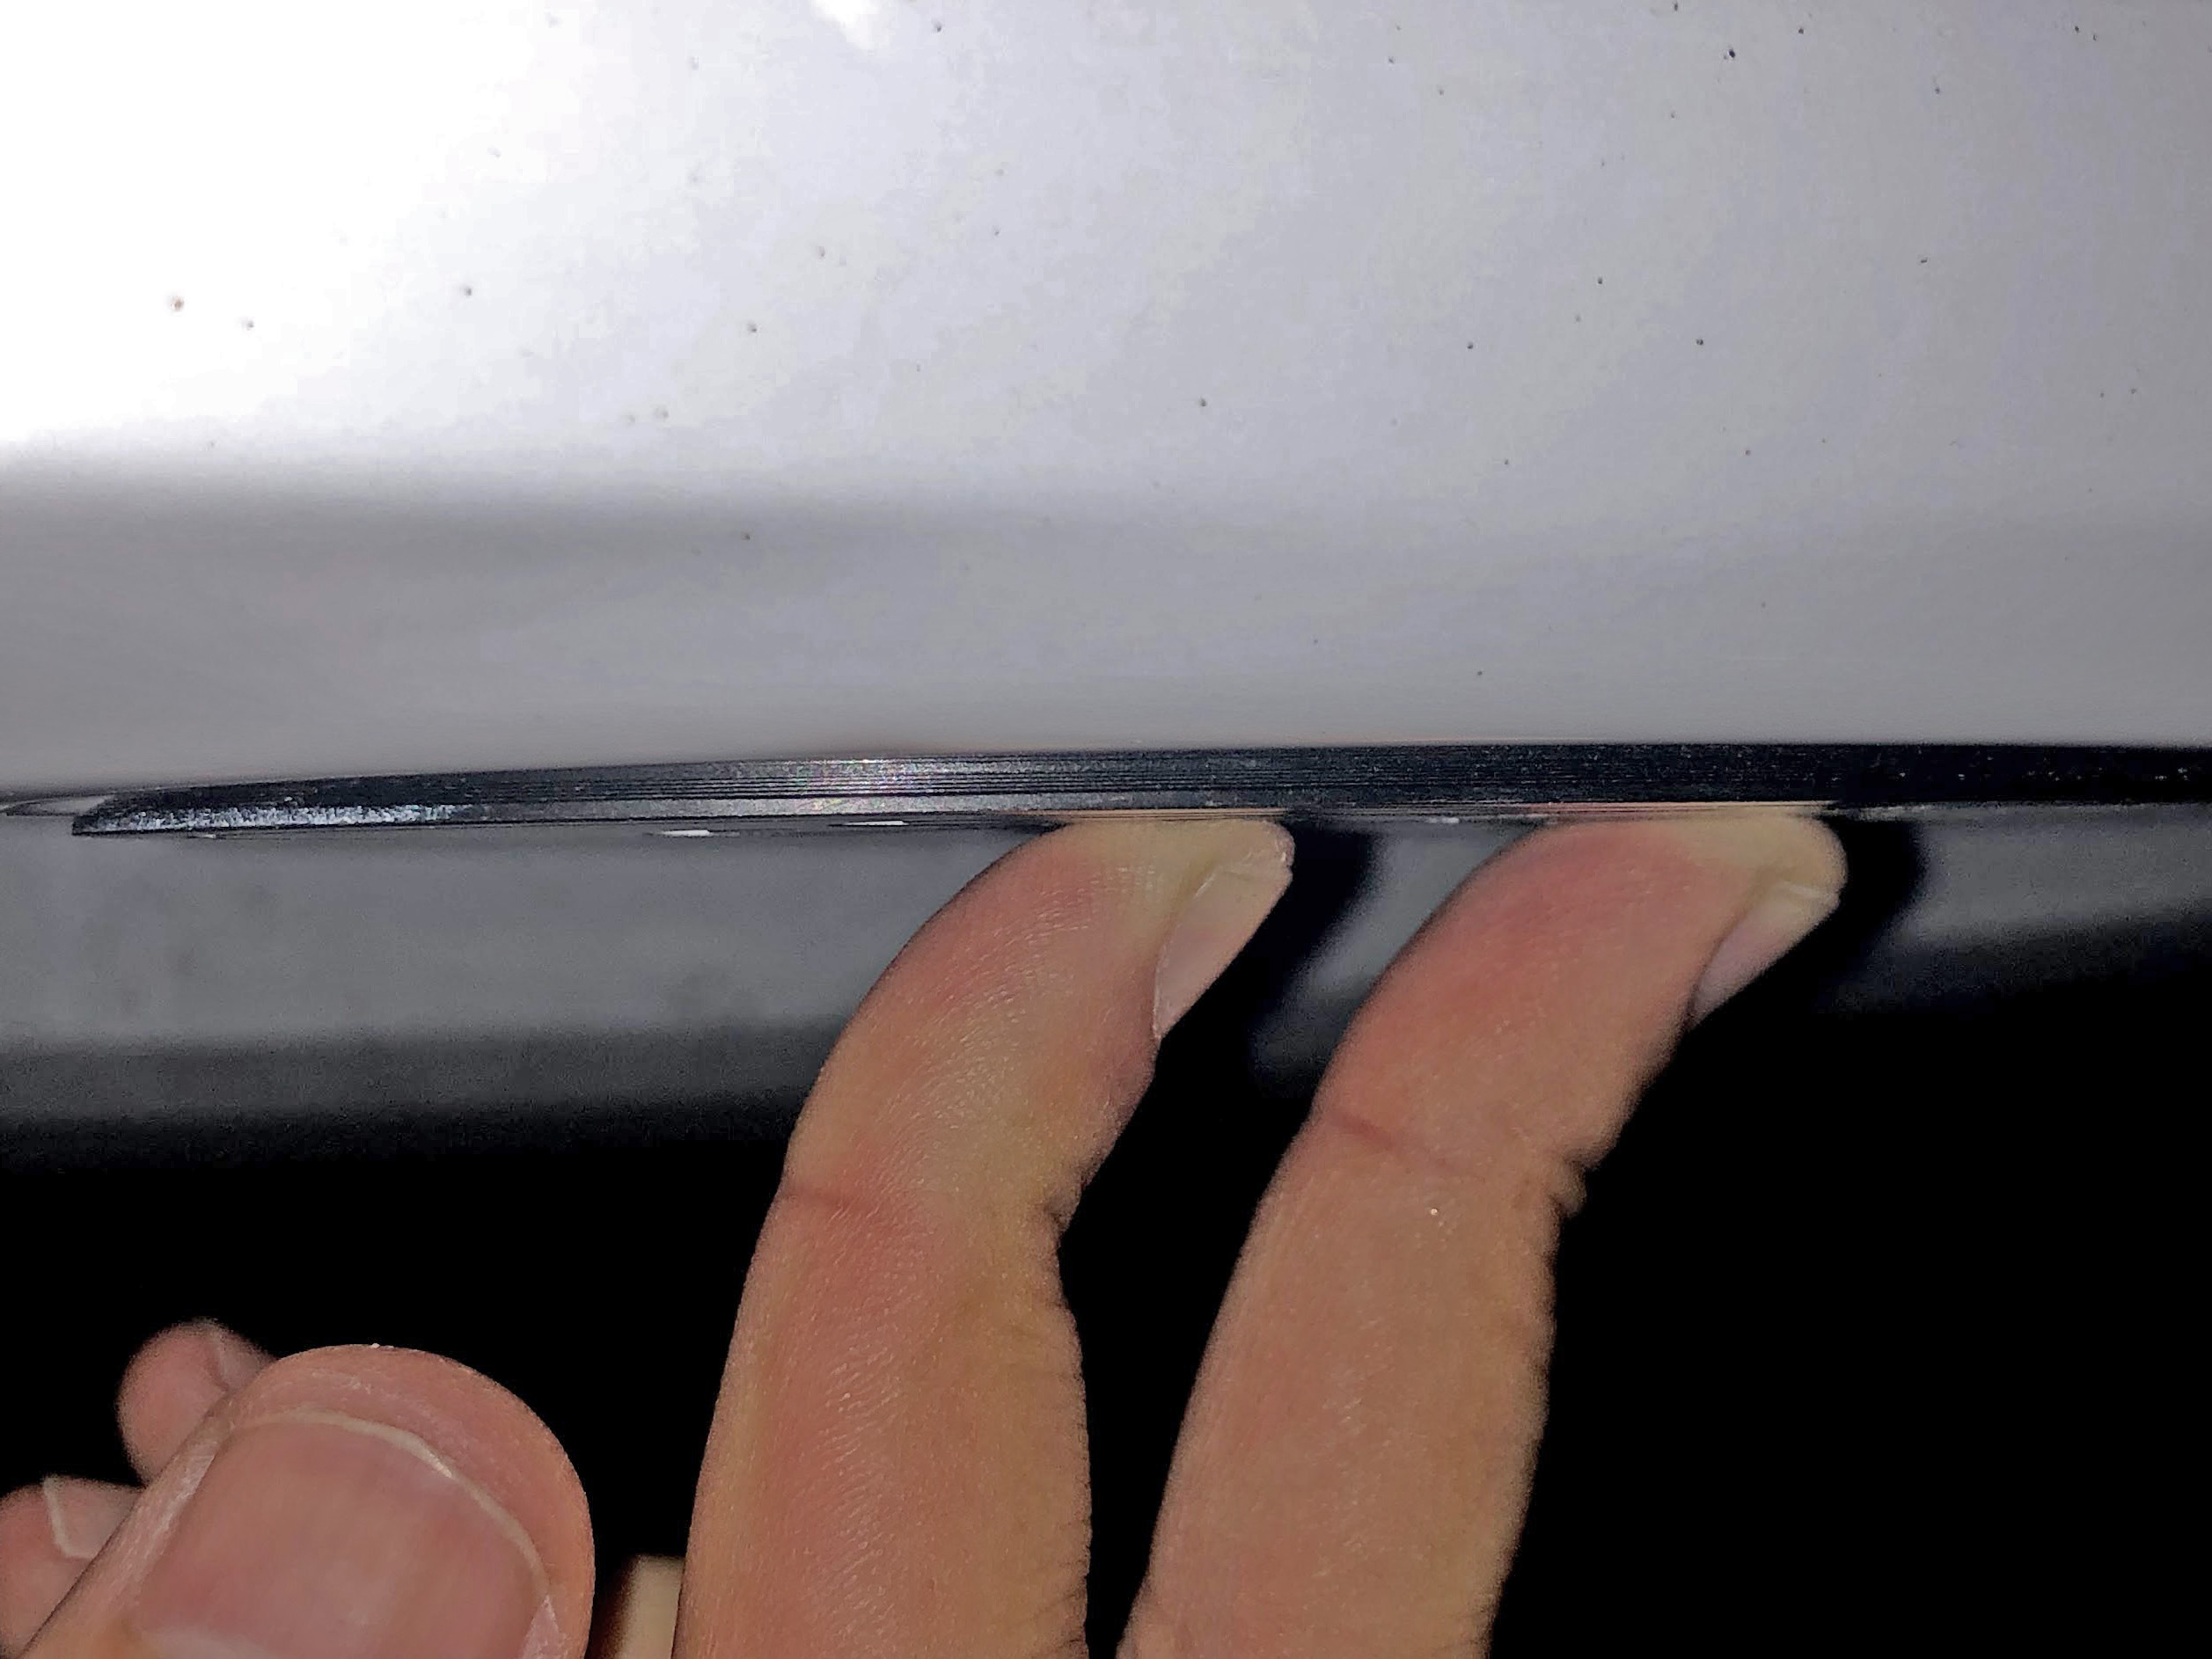
I did have a fit problem with the back, you can see here that i could fit a US 1 cent penny in the gaps that remained around the badge, to be flush with the body of the tailgate:
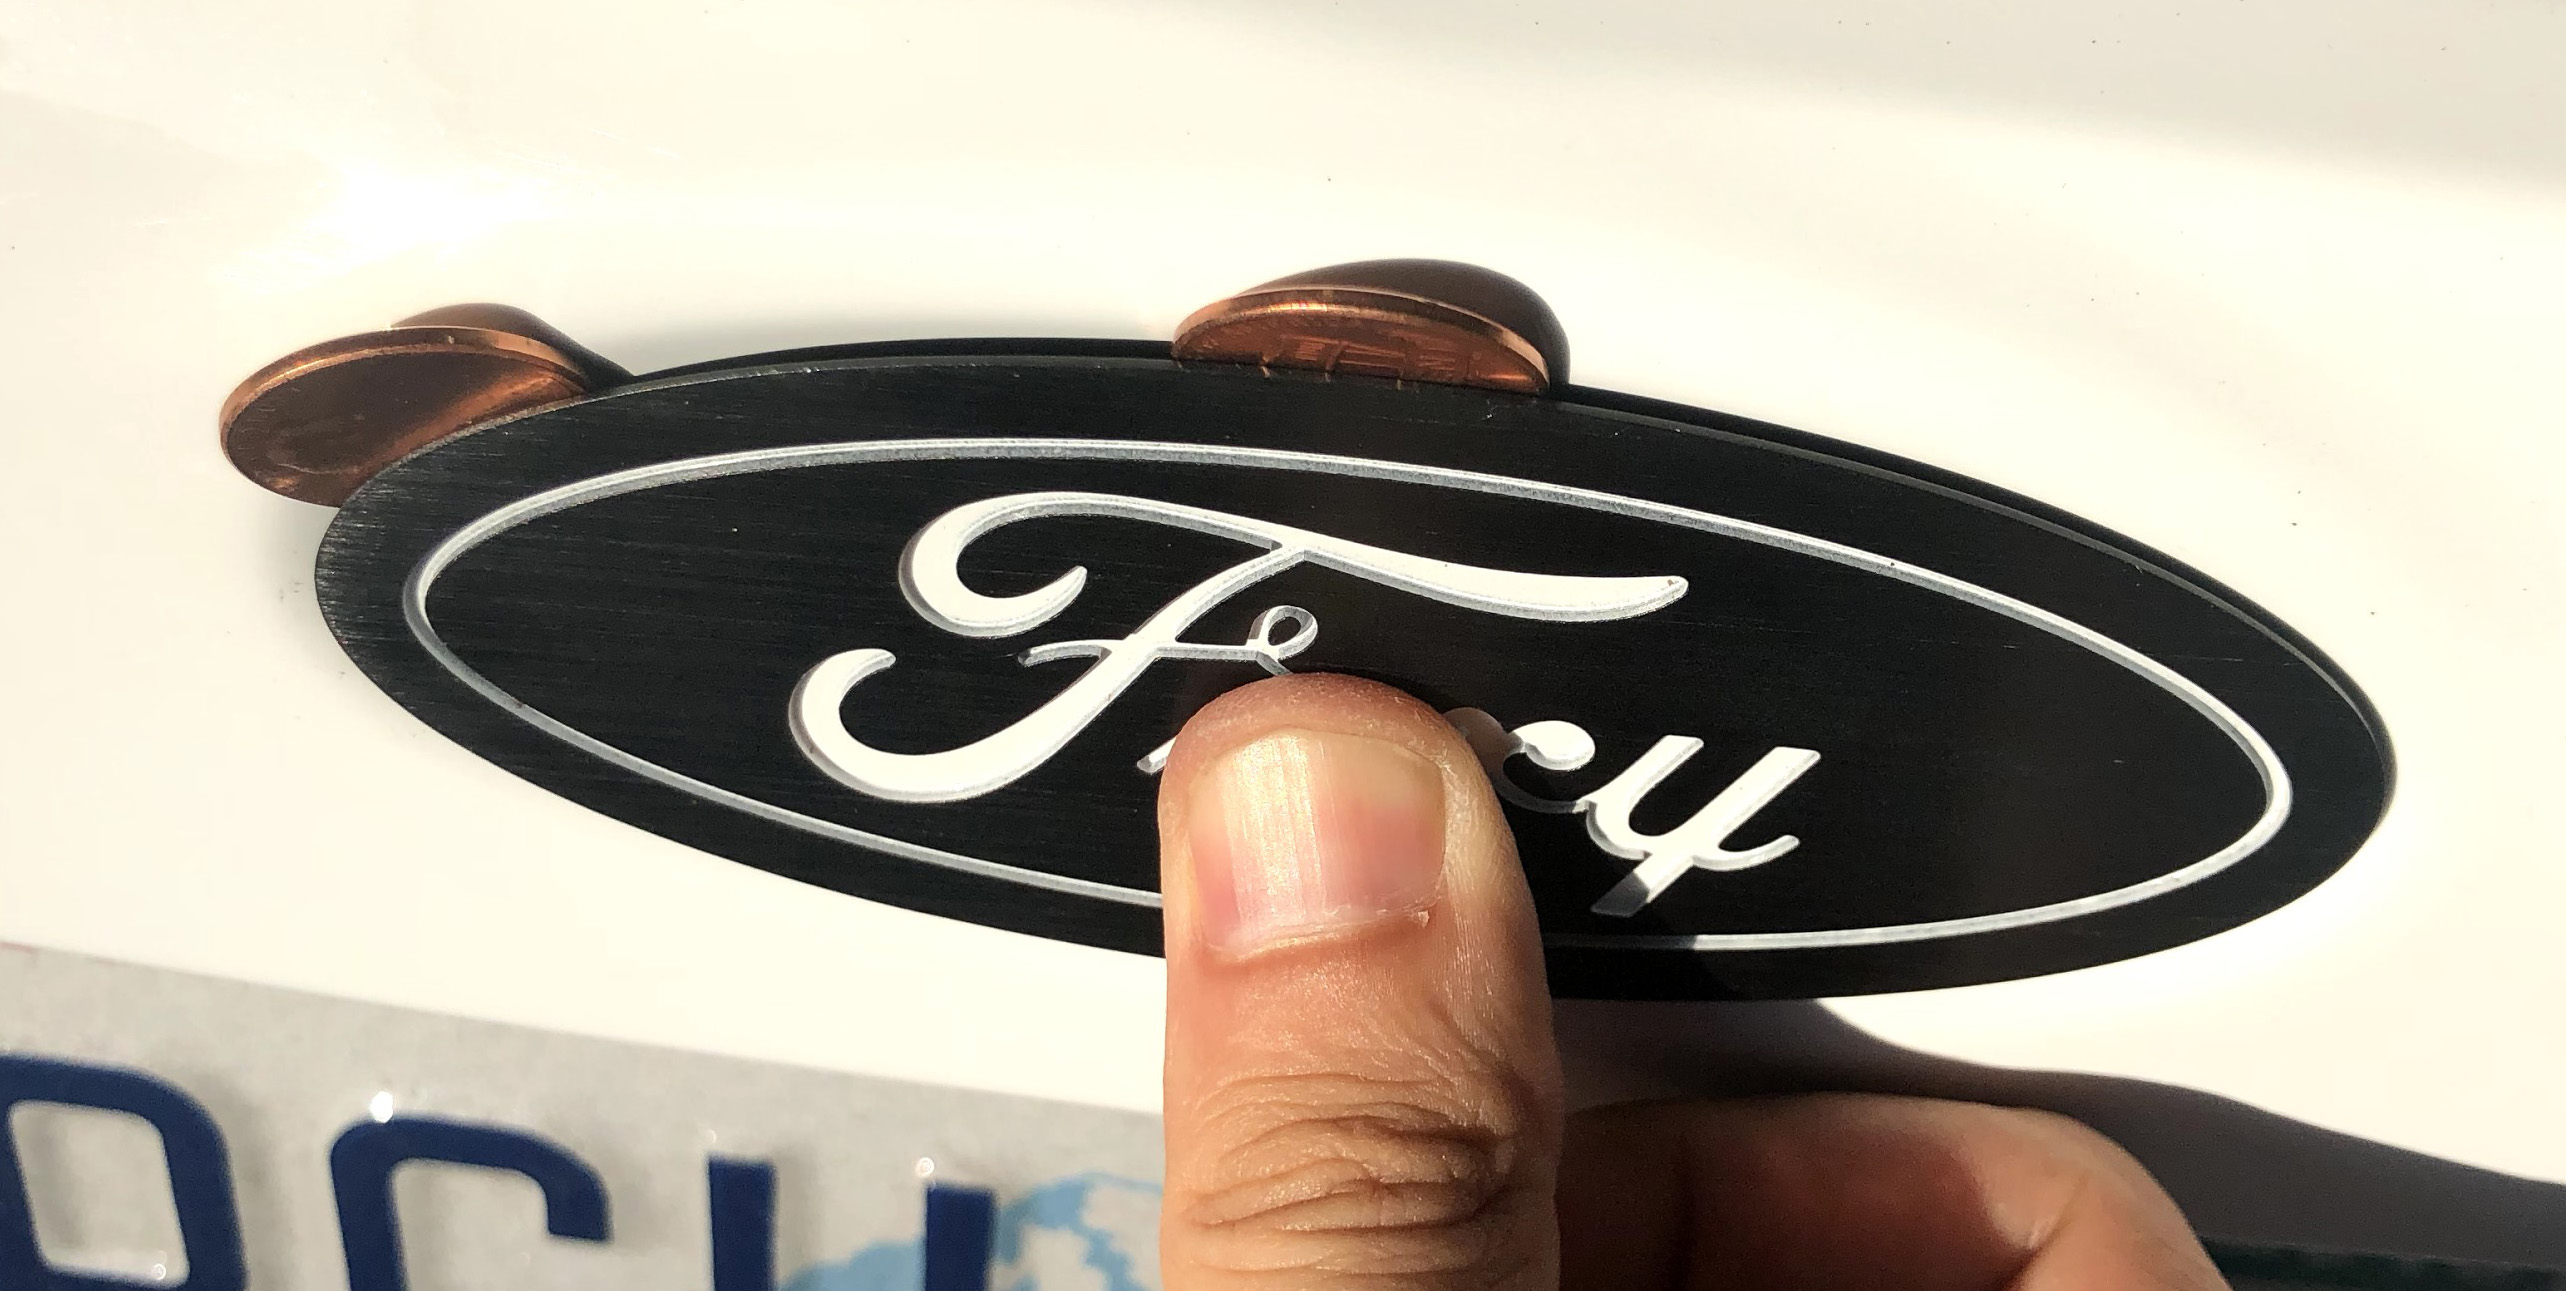
Here’s the same view, from flush above, without the penny in place:
I contacted the friendly folks at Billet Badges and they said to send back and they would grind down the width of a penny, i think we agreed on a few mms. When it came back a week later, perfect:
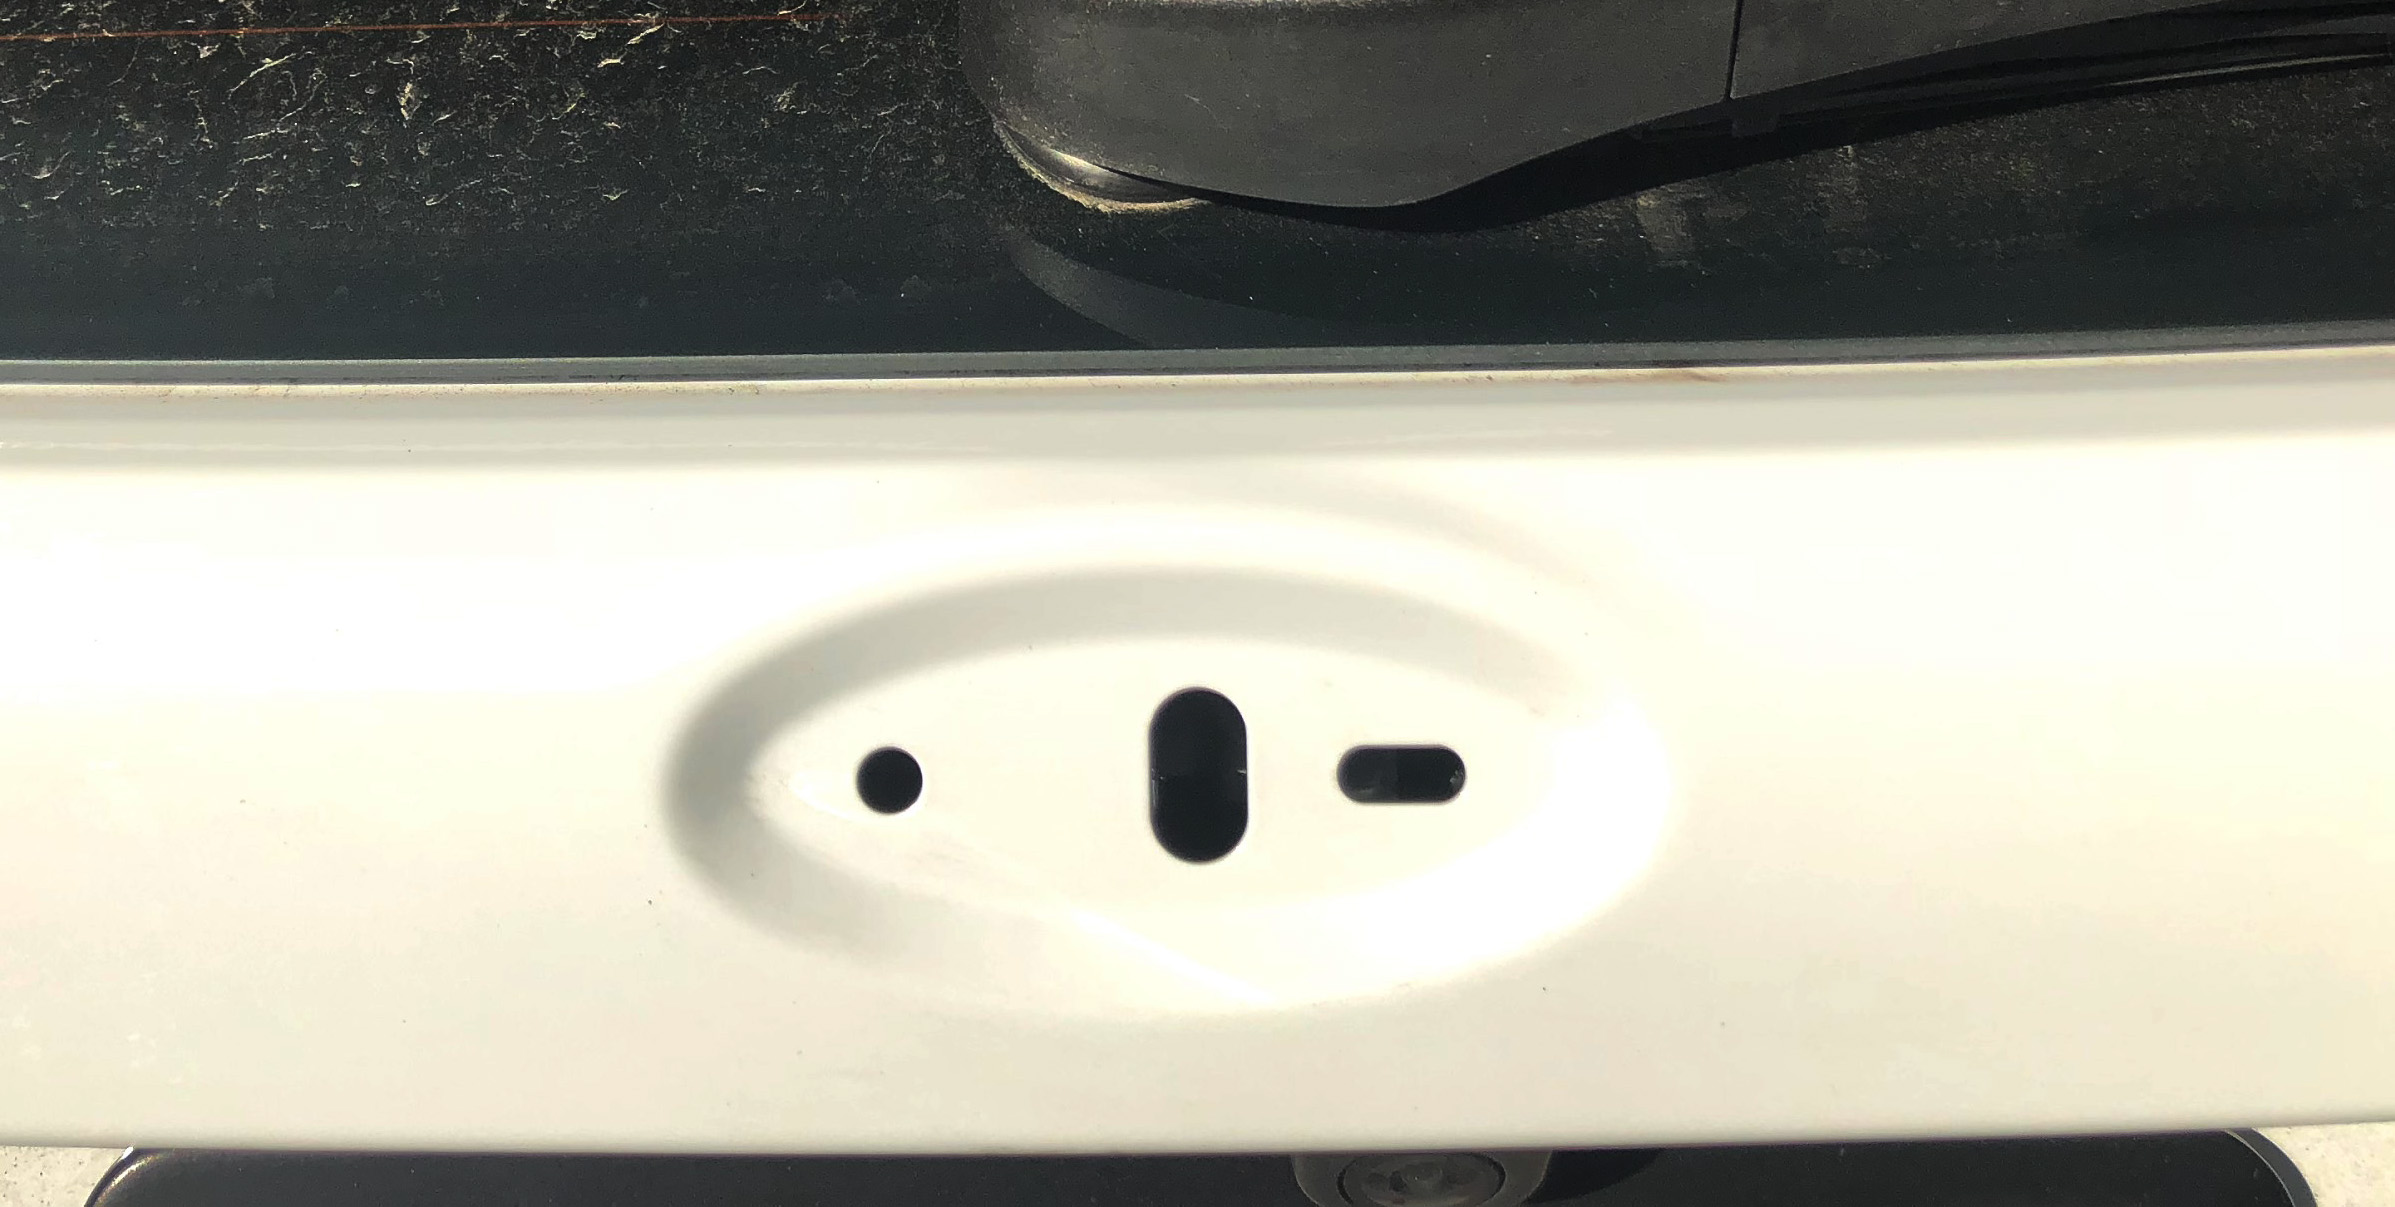
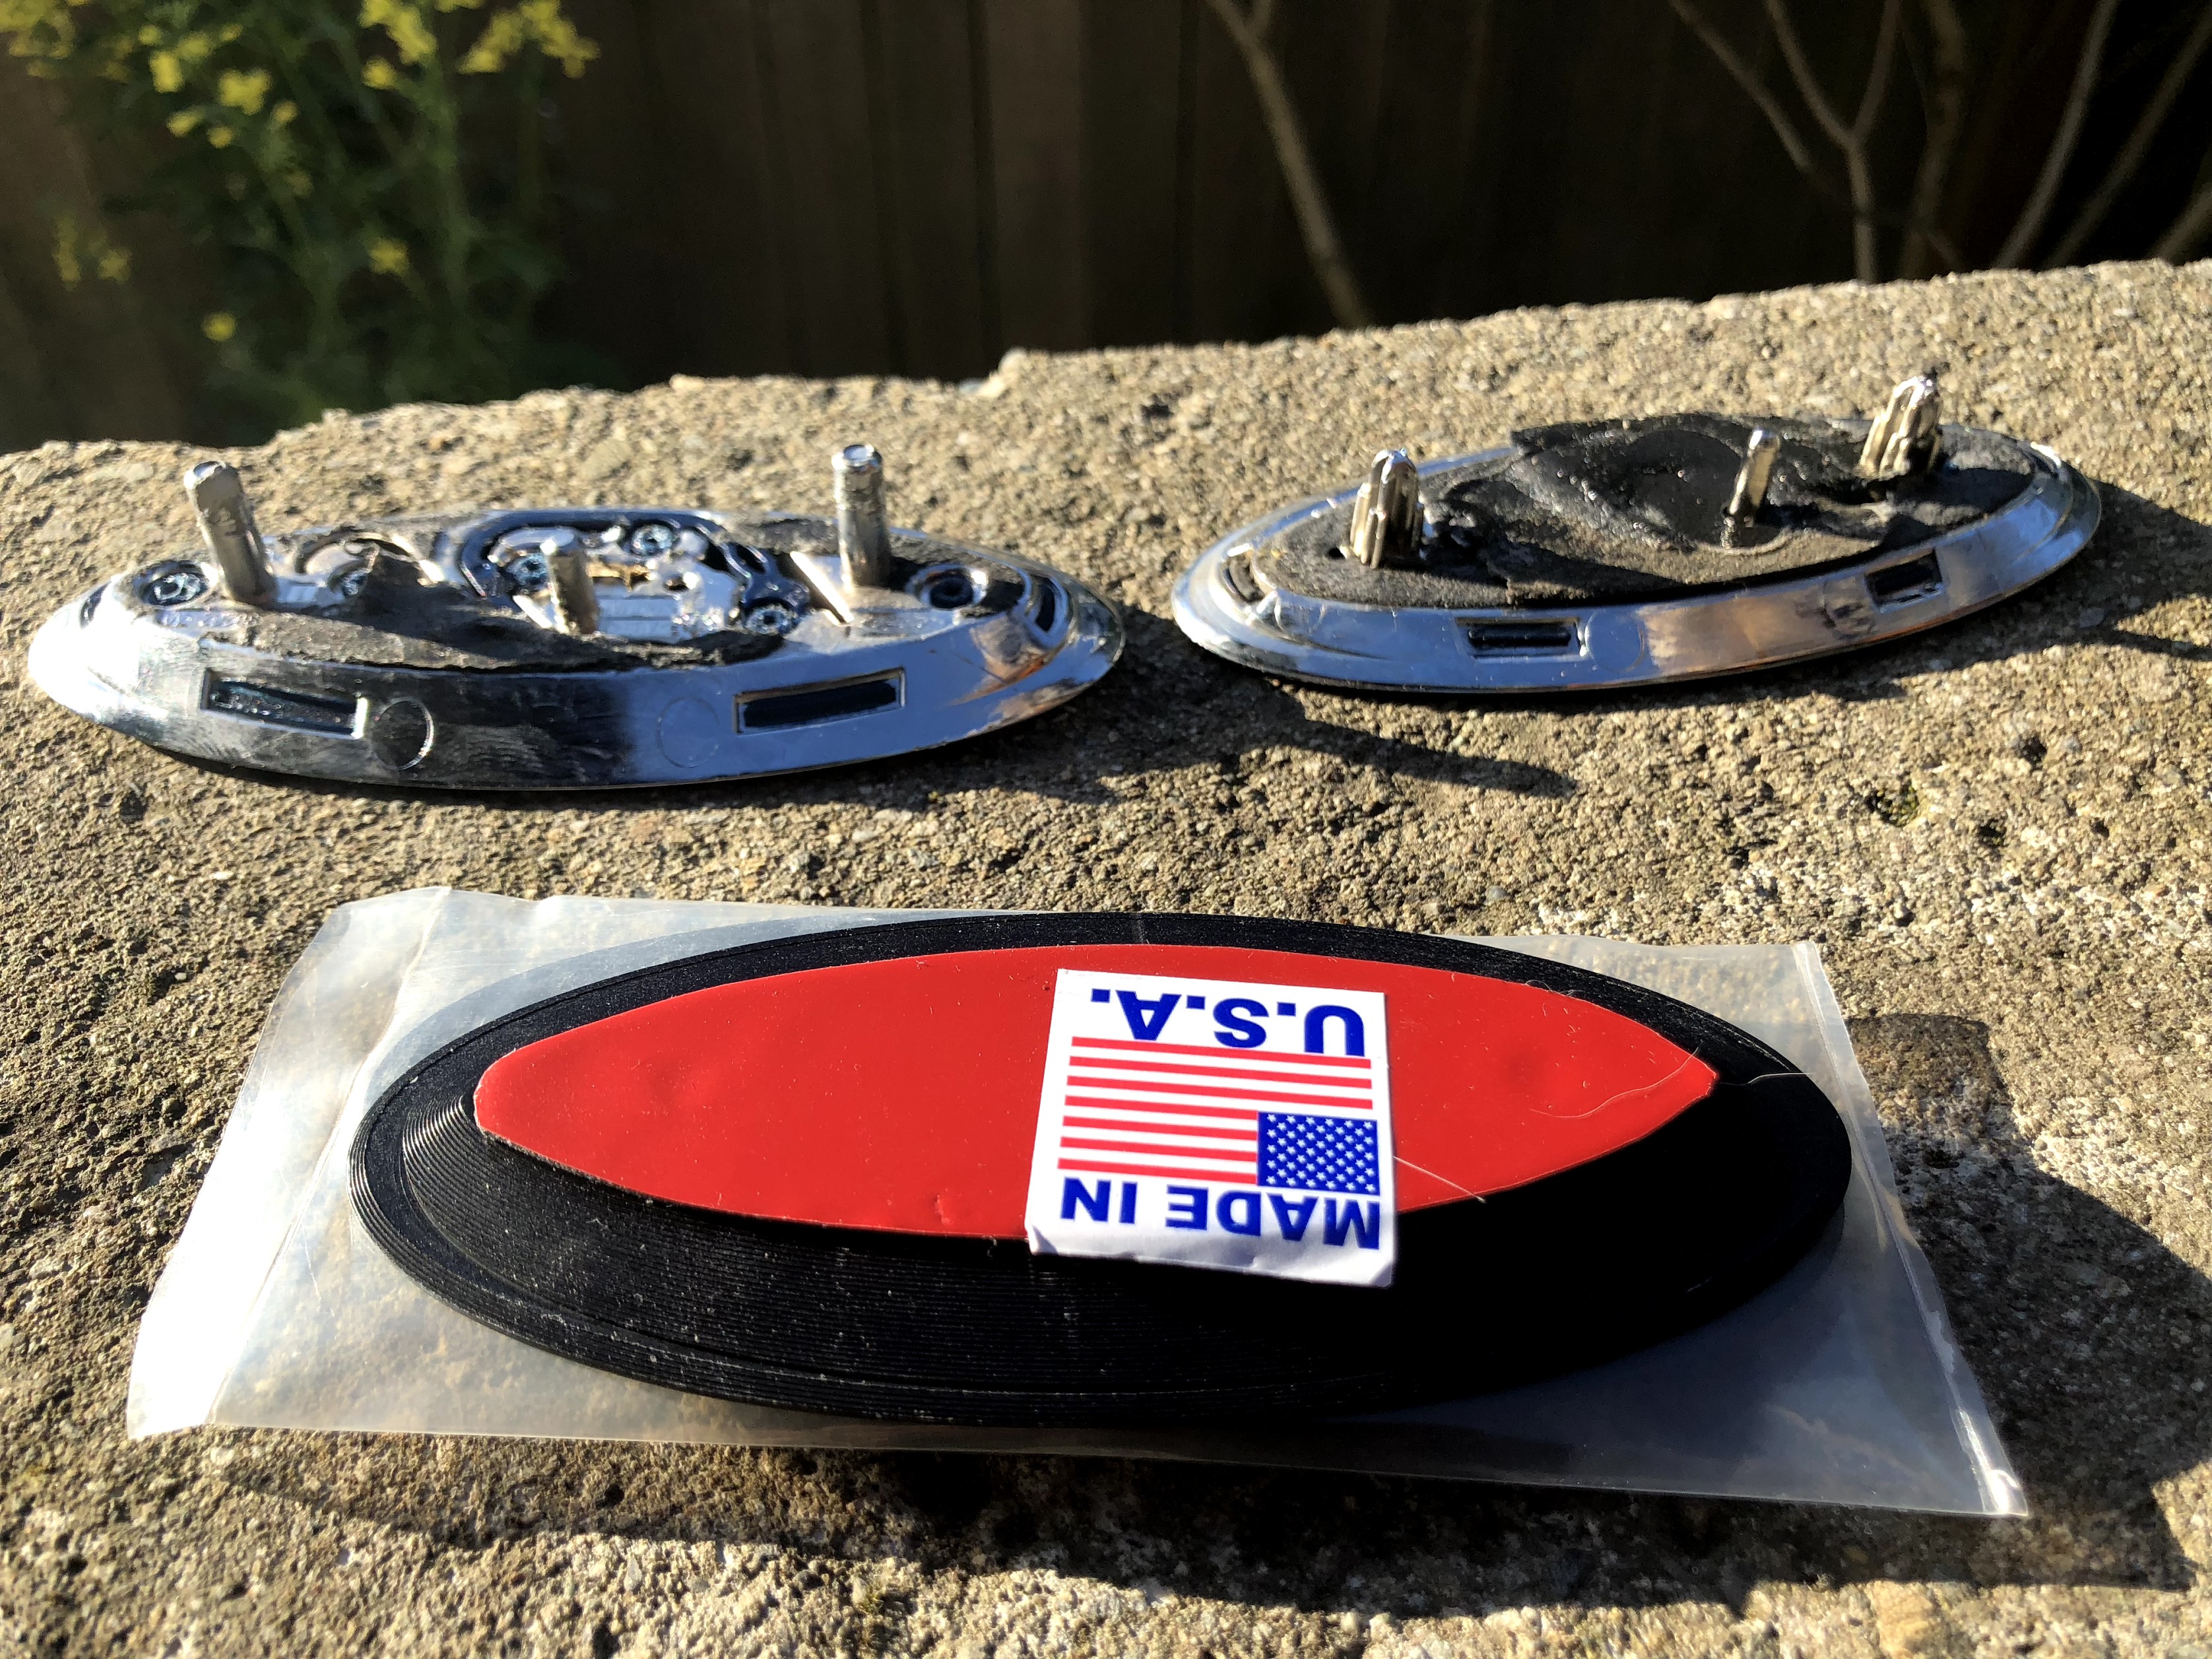
So in summary, here below are (left) the FRONT badge, which has screw fasteners and needs to be loosened from inside the engine bay, the (right) rear badge, which has alignment push-in plastic protrusions (can simply be pulled off after loosening the glue bond), and the back of my new badges which are smooth, with the Made in the USA sticker (thanks again BilletBadges.com!)
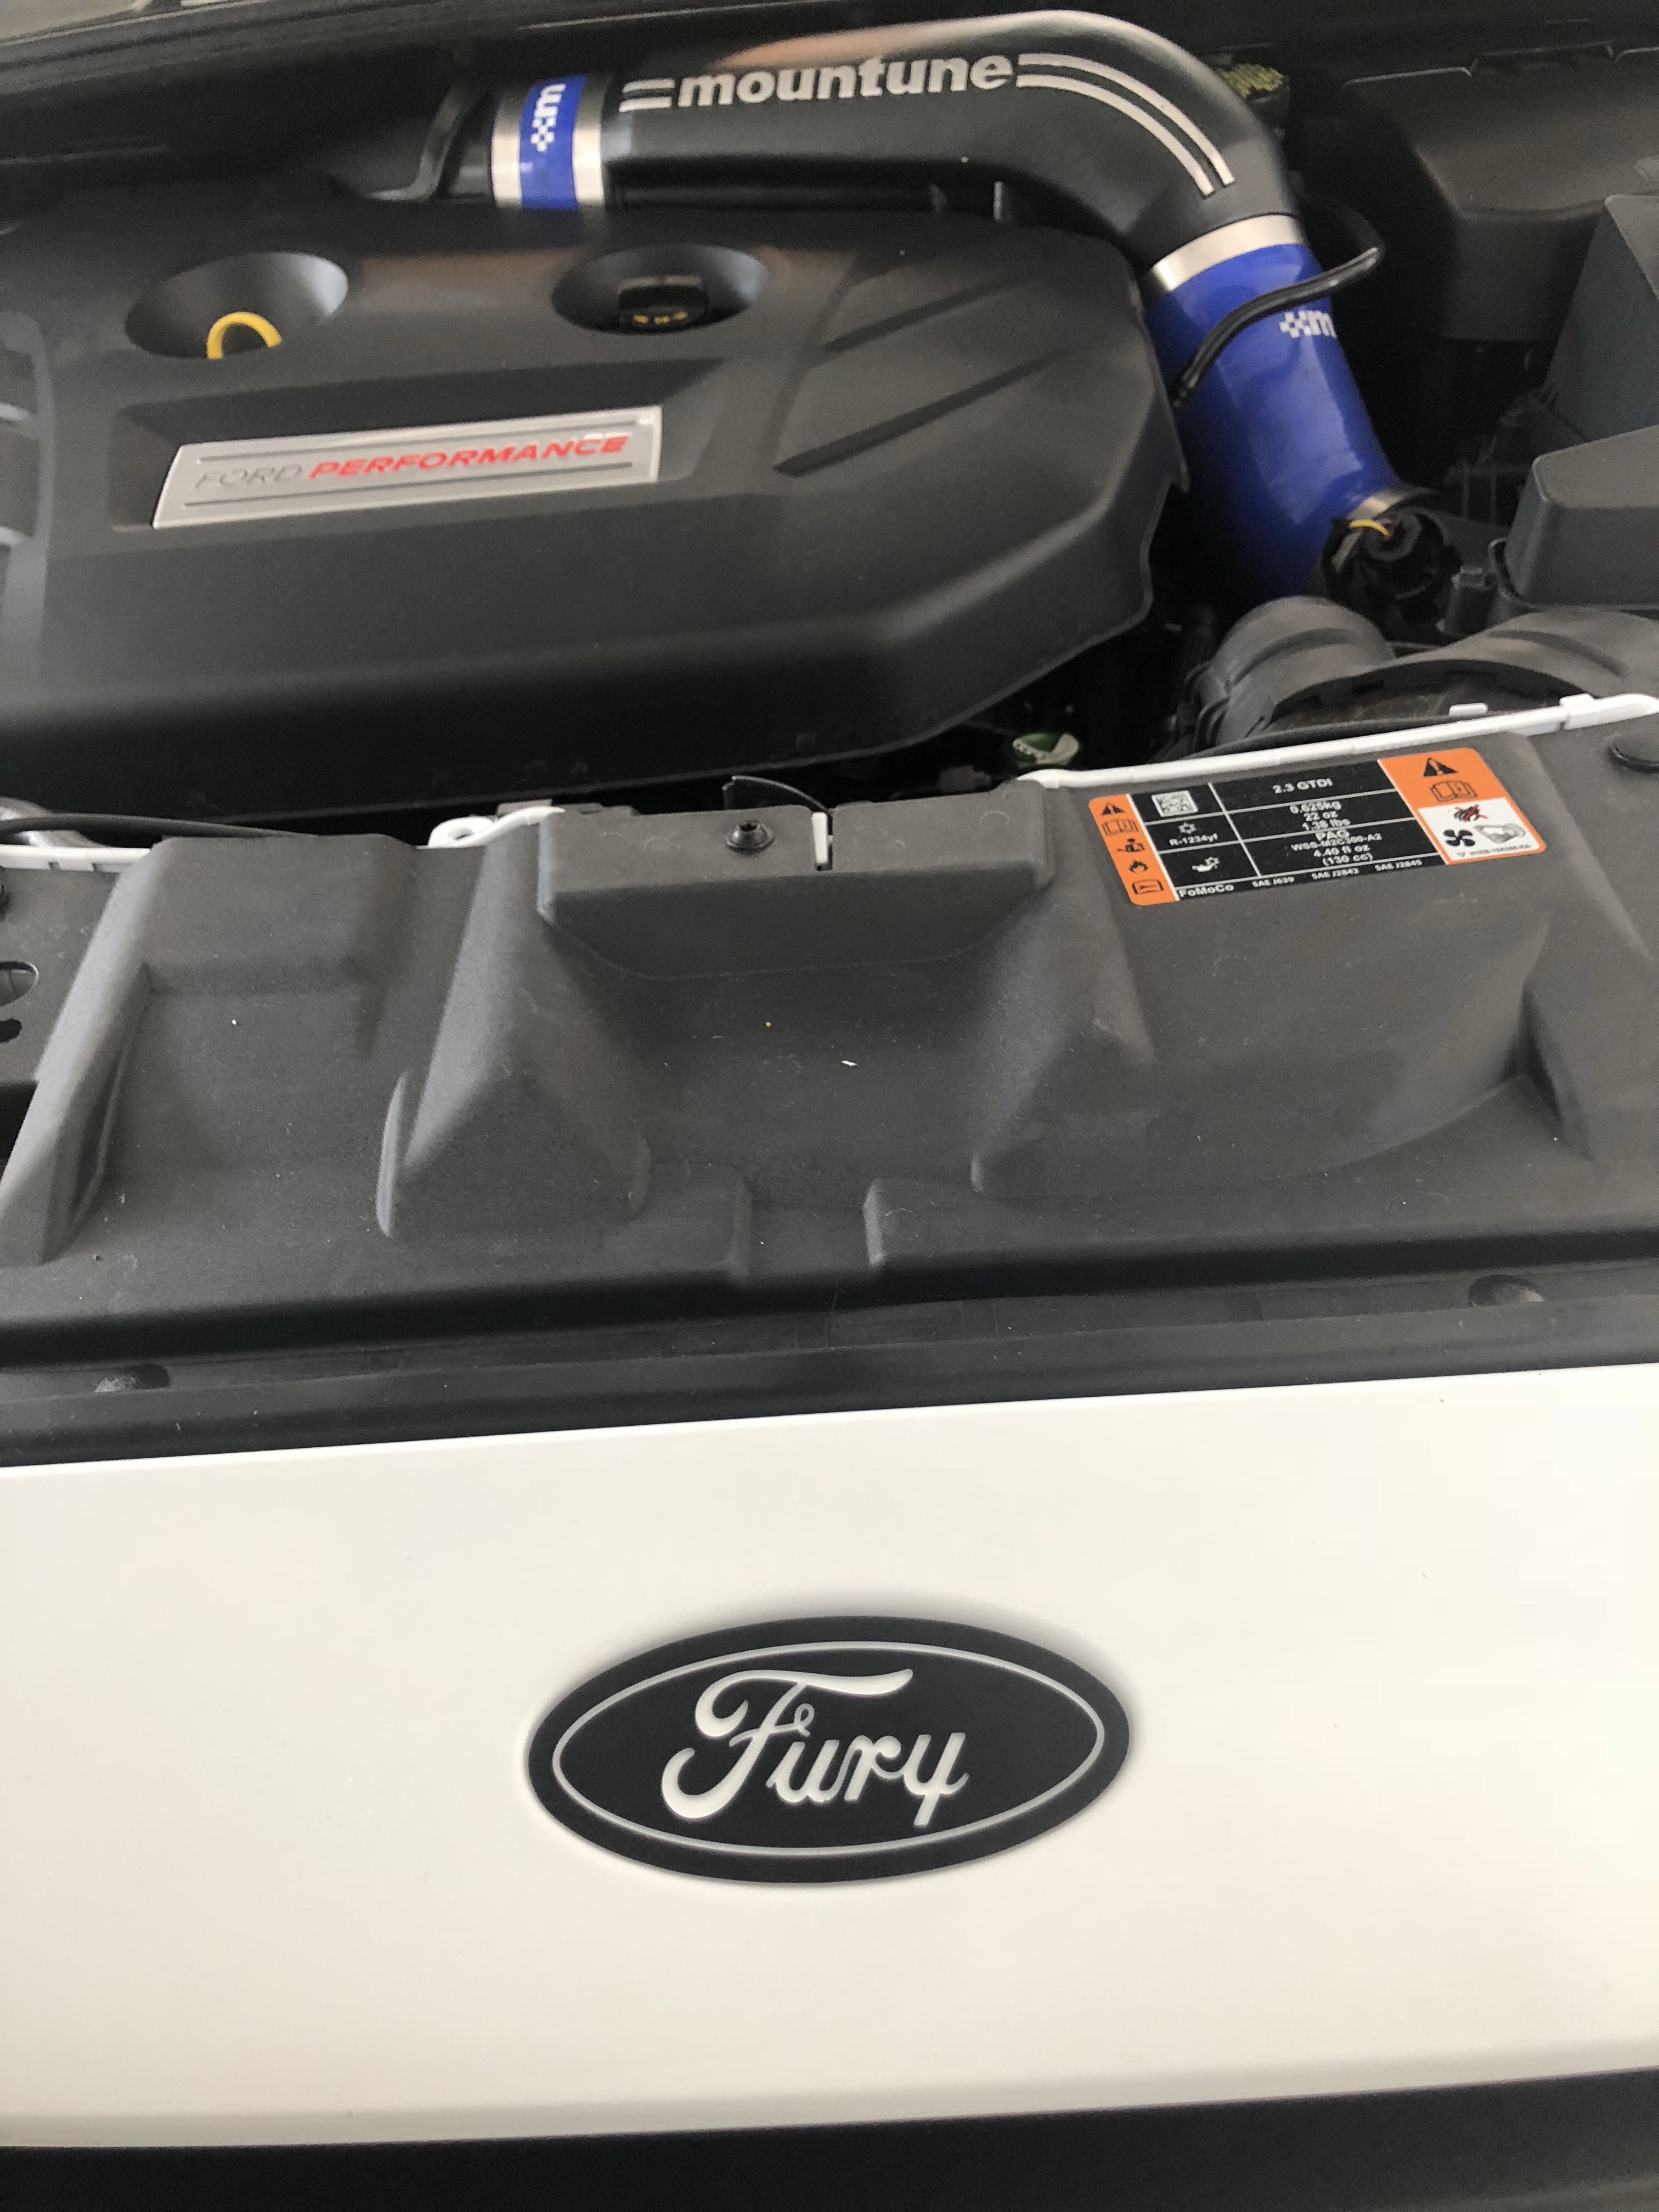
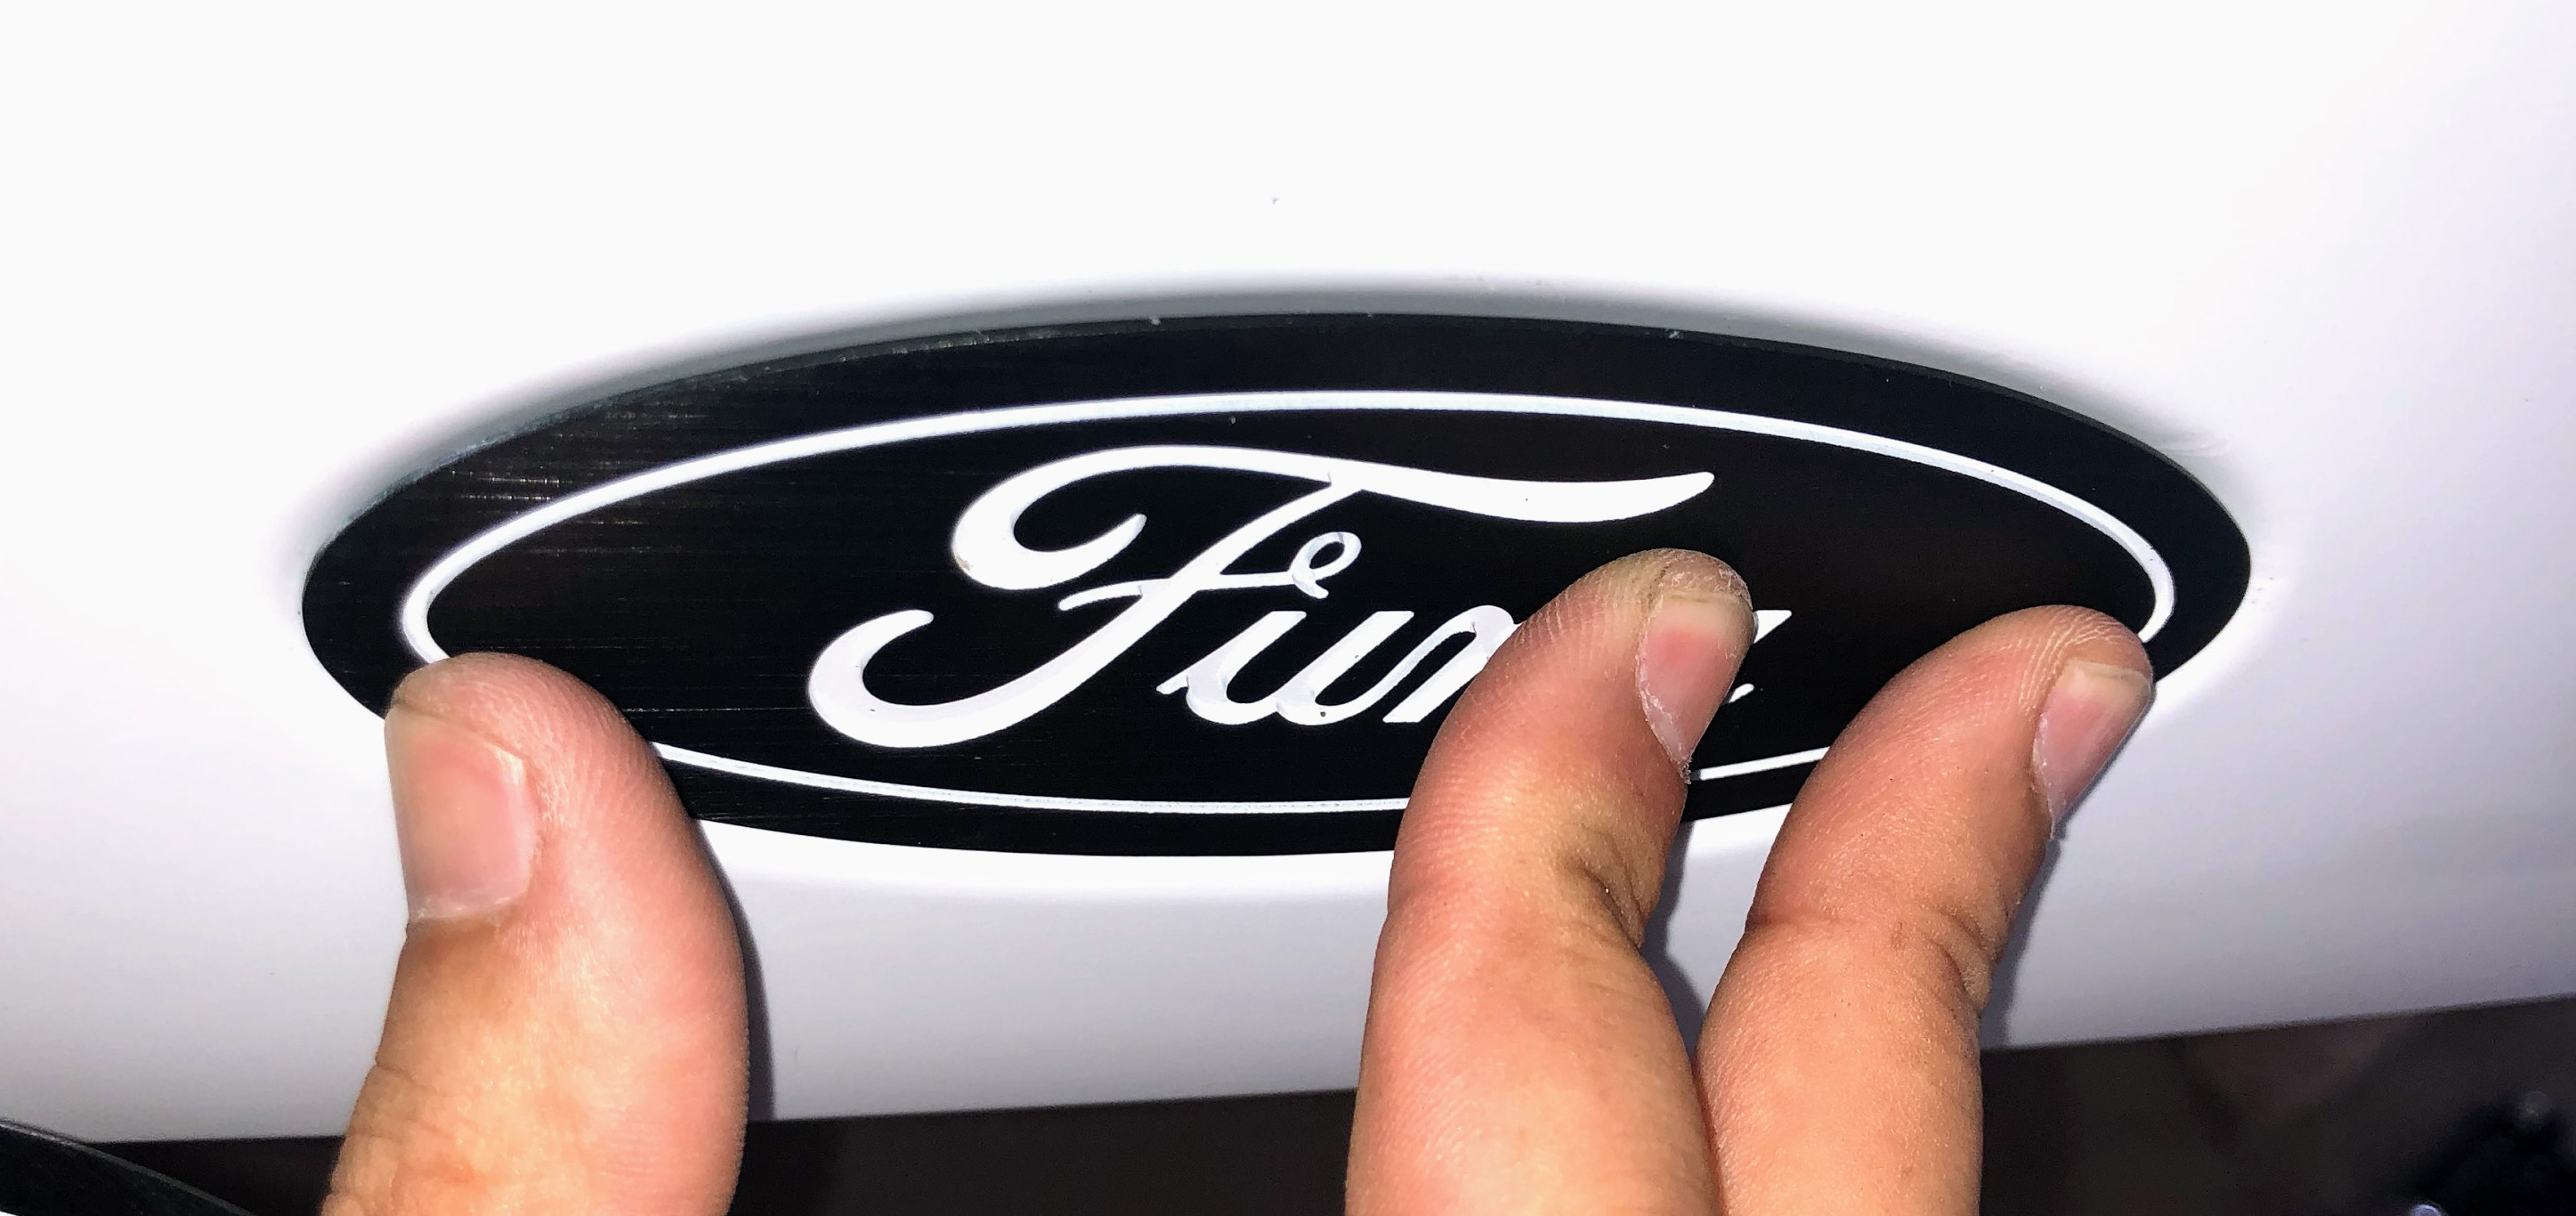
And here is the front after it is fully installed:
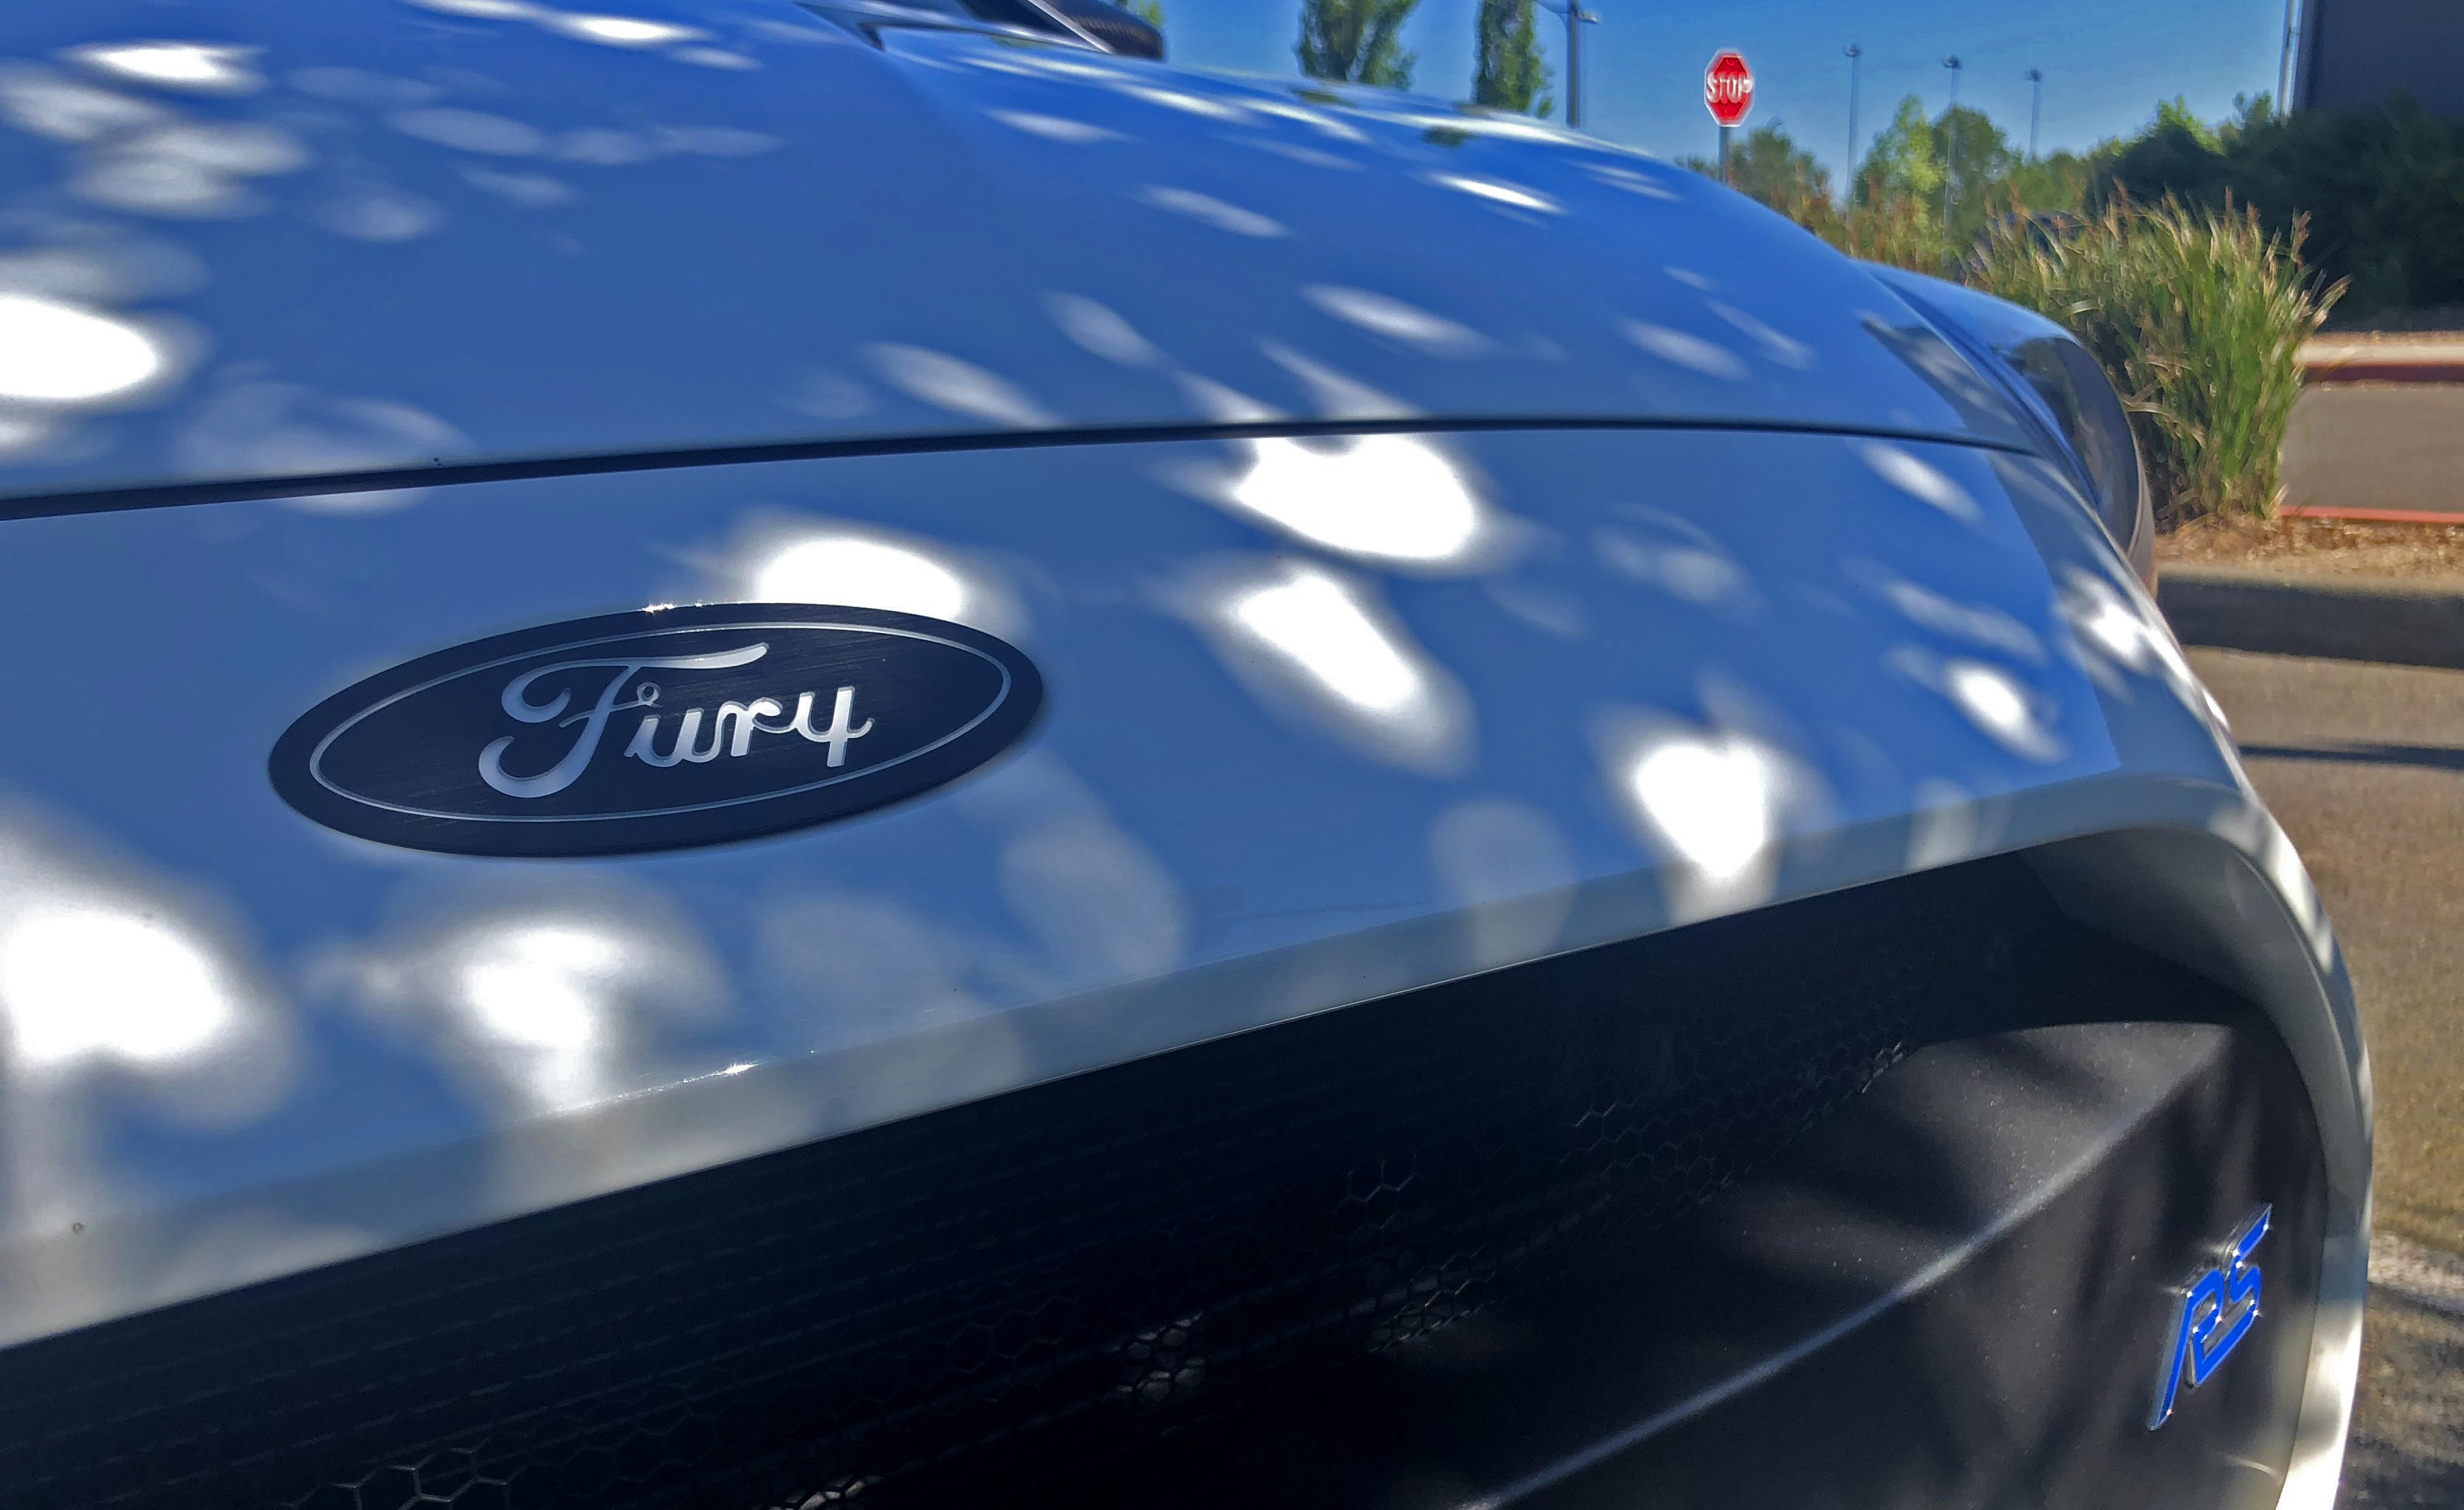
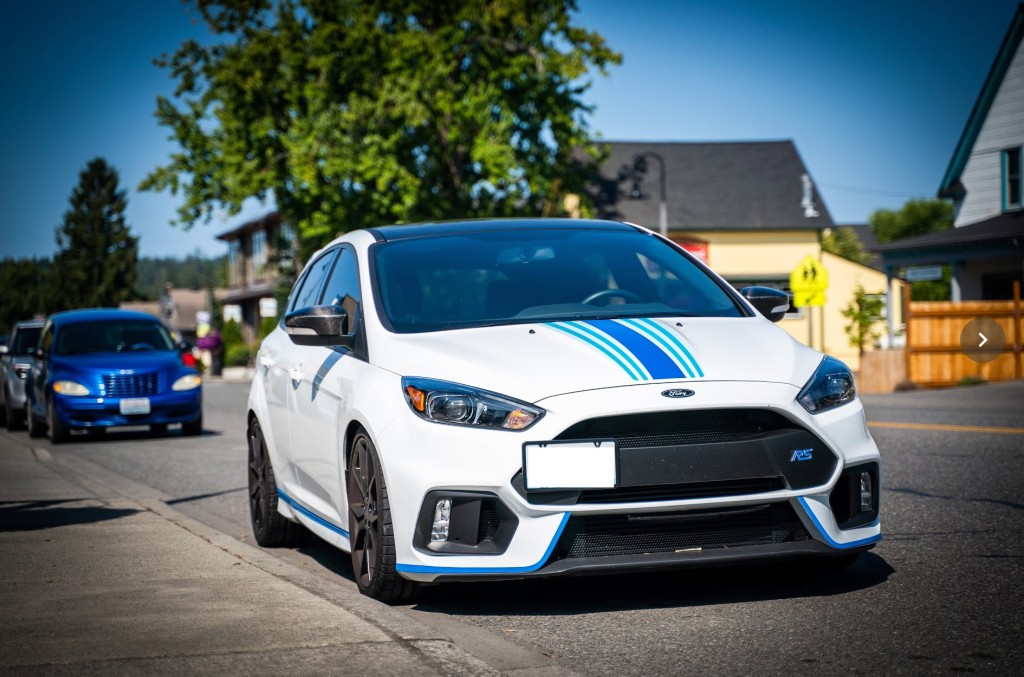
And a wider shot, with my now more recently added decal stripes:

21 replies on “Remove and Replace Ford Focus RS mk3 Billet Badges/Emblems”
The front badge seems like a 2 piece can you confirm I just want to remove the in ford ring and leave the outer chrome ring on the car! You get what I’m trying to say ?
it looks like a 2 piece but they are 1 piece. the “rim” that is different color, is just one piece of the plastic badge. So only 1 thing to remove, and once removed, you have a blank slate on the hood/tail of painted surface of the car. basically just a single, extremely cheap, plastic, piece that pops off!
so to be clear, no, you can’t just take out the ford logo, and leave the chrome circle…
Hi, can you sen the pictures of the back badge removal, the pictures does not show up in your blog. Thanks
There are a few pictures of the rear trunk/tail. “And the tailgate hole after some cleanup:” text is right before the first of them, do you not see?
Thank you for the write up. Miro is correct, the pics don’t show up, starting with “Now onto the back tailgate”.
Hey Chris, i’ve finally gotten around to updating these, let me know if you still can’t see thanks/sorry for delay
Thank you for the write up. Miro is correct, the pics don’t show up, starting with “Now onto the back tailgate”.
Rear images are dead.
That’s weird because I see them when I load the page…
Lula, try using a different browser eg: Chrome? I see the images fine from several computers, phones, that i tested on?
I don’t see the images in question from Chrome, IE, or from my phone.
Tony sorry about that, try again, i just updated all the photos and they should be working correctly?
fixed! try again
Lula i’ve now fixed the images, try again, work?
Which size ovals are the badges? Thanks.
The folks at Billet Badges made them for me from specs they got somewhere, I don’t have the exact measurements, but they would be able to tell you
hey mate, if on facebook can you contact me, cheers
Not on Facebook. Twitter forestkey
Not on Twitter lol. Email?
I updated the photos that were having some trouble loading for some folks, so the blog post should now properly show all photos, and i added more details of a hiccup with measuring the depth of the back badge (which Billet Badges fixed for me promptly to perfection). Post any other questions, happy to help!